Tailoring is the art of crafting garments that combine form, function, and flawless fit. It involves precision cutting, resizing, and handwork to create bespoke clothing that enhances personal style.
What is Tailoring?
Tailoring is the craft of creating or altering clothing to achieve a perfect fit, combining precision, artistry, and technical skill. It involves cutting, resizing, and finishing fabrics to create garments that flatter the body. Tailoring requires a deep understanding of measurements, fabric types, and construction techniques. Whether for bespoke suits, everyday alterations, or haute couture, tailoring blends form and function to enhance comfort, aesthetics, and durability. It is both a practical trade and an artistic expression, relying on handwork, attention to detail, and a passion for transforming raw materials into wearable masterpieces. Tailoring is essential in fashion, offering customization and personalization.
The Importance of Tailoring in Fashion

Tailoring plays a pivotal role in fashion by ensuring garments fit flawlessly, enhancing both aesthetics and comfort. It bridges creativity and functionality, allowing designers to craft unique, high-quality pieces. Tailoring elevates off-the-rack clothing through alterations, making it suitable for diverse body types. In bespoke fashion, it enables the creation of one-of-a-kind outfits that reflect personal style. Tailoring also preserves traditional craftsmanship while driving innovation in fabric manipulation and construction techniques. Its emphasis on precision and artistry makes it indispensable in haute couture and ready-to-wear collections, ensuring durability and timeless appeal. Thus, tailoring is a cornerstone of fashion, blending heritage with modernity to meet evolving style demands.
Basic Skills Required for Tailoring
Mastering tailoring begins with fundamental skills such as accurate measuring, cutting fabric precisely, and sewing with consistency. Proficiency in using tools like scissors, sewing machines, and irons is essential. Understanding fabric types and their behaviors ensures proper handling and selection for projects. Basic hand-stitching techniques are crucial for finishing seams and hems. Pattern reading and garment construction skills lay the foundation for creating well-fitted clothes. Attention to detail and patience are vital, as tailoring demands precision and care. Developing these skills through practice and formal training builds a strong base for advancing in the craft, enabling the creation of professional-quality garments.
Getting Started with Tailoring
Embark on your tailoring journey by gathering essential tools, understanding fabric types, and mastering basic measuring techniques. Start with simple projects to build confidence and skills gradually.
Essential Tools and Equipment
Mastering tailoring requires the right tools. A sewing machine, sharp scissors, measuring tape, and fabric shears are indispensable. Invest in a quality sewing machine for precision stitching. Use sharp scissors and shears to cut fabric cleanly. A measuring tape ensures accurate body measurements. Pins, seam rippers, and ironing tools are also crucial. A tailor’s ham and pressing board help shape garments. Thimbles protect fingers while hand-stitching. Thread, zippers, and buttons are basic supplies. Proper tools elevate your work, ensuring professional results. Start with essentials and expand as you progress in your tailoring journey.
Understanding Fabric Types and Uses
Understanding fabric types is crucial for successful tailoring. Common fabrics include cotton, wool, silk, and synthetic blends, each with unique properties. Cotton is durable and ideal for casual wear, while wool suits formal garments. Silk is luxurious but delicate, perfect for special occasions. Synthetic fabrics like polyester offer versatility and ease of care. Knowing the weight, texture, and drape of fabrics helps in selecting the right material for your project. For example, lightweight fabrics like chiffon are great for flowing designs, while heavy fabrics like denim are better for structured pieces. Choosing the right fabric ensures your garment looks and feels its best.
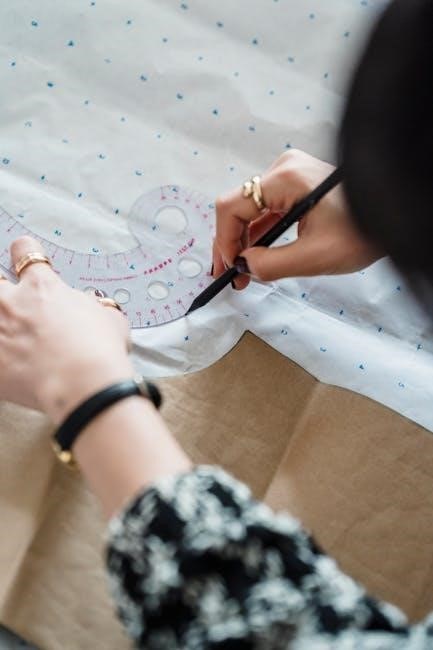
Measuring Techniques for Accurate Fits
Accurate measurements are the foundation of successful tailoring. Start by using a flexible tape measure to record key body measurements, such as chest, waist, hips, and inseam. Ensure the tape is level and not too tight or loose. Measure over the same undergarments and footwear intended for the final garment. Documenting these measurements helps create patterns or alterations that fit perfectly. For tailored garments like suits or dresses, additional measurements, such as shoulder slope and arm length, may be needed. Regularly double-checking measurements ensures precision and avoids costly mistakes. This step is essential for achieving a professional, custom fit in any tailoring project.

Leveling Up Your Tailoring Skills
Mastering tailoring requires practice, patience, and dedication. Start with simple projects, gradually advancing to complex techniques. Continuous learning and hands-on experience refine your craft and build confidence.
Beginner Projects to Build Confidence

Starting with simple projects helps build confidence in tailoring. Hemming pants, taking in seams, and altering sleeves are excellent beginner tasks. These small adjustments teach accuracy and patience. Gradually, you can move to more complex projects like resizing shirts or skirts, refining your skills. Each completed project boosts your confidence and prepares you for advanced techniques. Remember, practice is key to mastering tailoring. Begin with fabrics you’re comfortable working with, and don’t hesitate to experiment. These foundational projects lay the groundwork for more intricate creations, ensuring a smooth progression in your tailoring journey.
Intermediate Techniques for Better Results
Intermediate tailoring techniques focus on refining skills for professional finishes. Working with various fabrics, such as wool or silk, enhances versatility. Constructing jackets, dresses, or trousers teaches advanced pattern use and fitting. Learning to sew linings, install zippers, and craft buttonholes improves garment quality. Embellishments like embroidery or appliqué add a personal touch. Practicing these techniques builds precision and confidence, preparing you for complex projects. Regularly reviewing patterns and fitting adjustments ensures accuracy. These intermediate steps are crucial for achieving polished, professional results in your tailoring projects.
Advanced Methods for Professional Finishes
Advanced tailoring methods elevate garments to professional standards, focusing on precision and attention to detail. Techniques like hand-stitching, intricate embroidery, and custom embroidery enhance the quality of bespoke suits and intricate designs. Mastering the art of working with premium fabrics, such as silk or cashmere, ensures a luxurious finish. Advanced pattern-making and fitting adjustments allow for flawless customization. Incorporating high-end tools and equipment streamlines the process, while understanding fabric behavior ensures durability and comfort. These methods are essential for creating garments that stand out in both aesthetics and craftsmanship, catering to discerning clients who value exclusivity and perfection in their tailored pieces.
Key Aspects of Tailoring
Tailoring combines precision, creativity, and technical skill to craft garments that fit flawlessly. It involves understanding fabric, mastering cutting techniques, and balancing aesthetics with functionality for exceptional results.
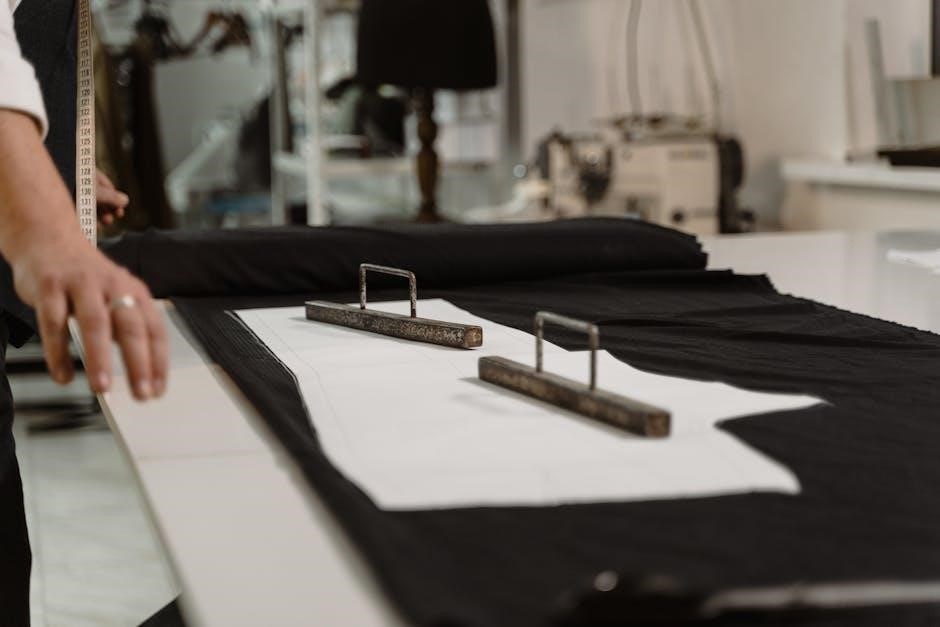
The Art of Cutting and Resizing
The art of cutting and resizing is a cornerstone of tailoring, requiring precision and creativity. It involves understanding fabric grain, patterns, and proportions to achieve a flawless fit. Tailors must master techniques like cropping, reshaping, and re-sizing garments to meet individual needs. This skill ensures that clothing not only fits perfectly but also maintains its aesthetic appeal. Proper cutting and resizing are essential for transforming raw materials into bespoke pieces, making it a fundamental aspect of the tailoring process. Mastery of this art elevates a tailor’s work, ensuring garments are both functional and visually stunning.
Handwork and Embellishments
Handwork and embellishments are essential elements in tailoring, adding a personal touch and elevating garments to a professional level. Techniques like hand-stitching, embroidery, and buttonhole creation showcase a tailor’s skill and attention to detail. These methods ensure durability and a polished finish, distinguishing bespoke pieces from mass-produced items. Embellishments such as intricate stitching or decorative elements enhance the garment’s aesthetic appeal. Mastery of handwork requires patience and practice, making it a cornerstone of advanced tailoring. By incorporating these details, tailors can create unique, high-quality garments that reflect both craftsmanship and artistry, setting their work apart in the fashion industry.
Combining Form and Function in Garments
Combining form and function in tailoring ensures garments are both visually appealing and practical. A well-tailored piece balances aesthetics with comfort and usability, making it versatile for various occasions. Tailors achieve this by selecting fabrics that suit the garment’s purpose, incorporating functional details like pockets or adjustable closures, and ensuring a flattering fit. Attention to ergonomics and movement allows the wearer to feel comfortable without compromising style. This harmonious blend of design and utility is a hallmark of expert tailoring, creating garments that are not only beautiful but also durable and functional, meeting the wearer’s needs while making a fashion statement.

Common Tailoring Projects

Common tailoring projects include hemming pants, taking in seams, creating bespoke suits, and altering clothing to fit perfectly, ensuring both style and functionality for everyday wear.

Hemming Pants and Taking in Seams
Hemming pants and taking in seams are fundamental tailoring projects that ensure a perfect fit. Hemming involves folding and stitching the raw edges of pant legs to prevent fraying and achieve a polished look. Taking in seams requires precision to reduce fabric for a slimmer fit. Both techniques demand accurate measurements and careful stitching to maintain garment integrity. These tasks are essential for altering ready-made clothing or creating custom pieces. With basic tools like a sewing machine and iron, anyone can master these skills, enhancing their wardrobe with professional finishes. These projects are ideal for beginners, offering practical experience in tailoring basics.
Creating Bespoke Suits
Creating bespoke suits is the pinnacle of tailoring, offering a perfect blend of style, fit, and craftsmanship. This process involves taking precise measurements, selecting premium fabrics, and meticulously constructing each garment to flatter the wearer’s physique. A bespoke suit requires advanced skills in pattern-making, cutting, and hand-stitching to ensure a flawless finish. Tailors must pay close attention to details like shoulder alignment, sleeve length, and trouser break to achieve a polished look. This labor-intensive craft demands patience and expertise, making bespoke suits a true luxury. For tailors, mastering this art is a testament to their dedication and skill in the field.
Designing and Altering Clothing
Designing and altering clothing is a core aspect of tailoring, focusing on creating or modifying garments to achieve a perfect fit and desired aesthetic. Tailors use their skills to reshape, resize, or redesign clothing, ensuring it flatters the wearer’s body. This process involves precise measurements, pattern adjustments, and meticulous stitching. Common alterations include hemming pants, taking in seams, and adjusting sleeve lengths. Designing bespoke pieces, like custom suits or dresses, allows tailors to express creativity while meeting specific client needs. Whether refining existing garments or crafting new ones, this skill showcases a tailor’s ability to blend functionality with style, making it a cornerstone of their craft.

Tailoring for Different Body Types
Tailoring for various body types requires understanding measurements and proportions to create garments that flatter and fit perfectly, ensuring comfort and style for every individual shape.
Understanding Body Measurements
Accurate body measurements are fundamental to tailoring, ensuring garments fit perfectly. Key measurements include chest, waist, hips, inseam, and sleeve length. These dimensions guide pattern creation and alterations. Properly taking measurements requires a flexible tape measure and a level stance. Even small discrepancies can affect fit, so precision is crucial. Understanding body proportions helps tailors address individual needs, from broad shoulders to longer torsos. Regularly updating measurements ensures garments evolve with the wearer’s body changes. Mastery of this step is essential for creating flattering, well-fitting clothing that enhances the wearer’s appearance and comfort. It forms the foundation of successful tailoring projects.
Customizing Garments for Perfect Fits
Customizing garments involves tailoring clothes to match individual body types and preferences. This process goes beyond basic alterations, focusing on creating a flawless fit. Tailors achieve this by analyzing body measurements, fabric drape, and personal style. Techniques include adjusting patterns, reshaping seams, and incorporating design elements like darts or tucks. Understanding fabric types and their stretch or structure is crucial for achieving the desired silhouette. Advanced skills, such as handwork and embroidery, can further enhance customization. The goal is to craft garments that not only fit perfectly but also reflect the wearer’s unique identity. This level of personalization sets tailored clothing apart from ready-to-wear options.
Addressing Common Fit Issues
Common fit issues, such as ill-fitting shoulders, uneven hems, or tight waistlines, can be resolved through precise tailoring techniques. Tailors often address these by adjusting patterns, taking in or letting out seams, and reshaping garments to align with the body. For example, adding darts or tucks can improve fit around the torso, while altering sleeve lengths ensures comfort and proportion. Understanding fabric stretch and drape is key to solving issues like puckering or sagging. Accurate measurements and a keen eye for detail help prevent fit problems before they arise. Mastering these adjustments ensures garments look and feel their best, enhancing both comfort and confidence.

Starting a Tailoring Business
Starting a tailoring business requires a solid business plan, refined skills, and excellent client communication to deliver custom fits and build a loyal customer base.
Identifying Your Target Market
Identifying your target market is crucial for a successful tailoring business. Start by researching demographics, preferences, and needs in your area. Consider niche markets, such as bespoke suits, cultural attire, or alterations. Analyze competitors and gaps in the market. Use online resources and client interactions to understand trends and demand. Focus on offering unique value, like specialized fabrics or custom fits, to attract a specific audience. Tailor your services to meet the needs of your target market, ensuring your brand stands out. This step lays the foundation for building a loyal customer base and growing your business effectively.
Building a Portfolio of Your Work
A portfolio is essential for showcasing your tailoring skills and attracting clients. Include high-quality images of your best projects, such as bespoke suits, altered garments, and unique designs. Highlight your attention to detail and craftsmanship. Use before-and-after photos to demonstrate your ability to transform clothing. Add testimonials from satisfied clients to build credibility. Organize your portfolio by categories, like formal wear or casual alterations, to make it easy to navigate. Regularly update your portfolio with new pieces to reflect your growth and versatility as a tailor. This visual representation of your work will help potential clients trust your expertise and see your value.
Marketing Your Tailoring Services
Effective marketing is crucial for attracting clients to your tailoring business. Start by building a strong online presence through a professional website and social media platforms. Showcase your portfolio, share testimonials, and post regular updates to engage your audience. Utilize SEO to ensure your website appears in search results for tailoring services. Leverage email marketing to keep clients informed about promotions, new services, or events. Partner with local businesses or influencers to expand your reach. Offer referral incentives to encourage satisfied clients to bring in new customers. Highlight your unique selling points, such as bespoke designs or quick turnaround times, to stand out in the market. Consistent branding and personalized communication will help build trust and loyalty with your clientele.
Tailoring is a timeless craft that evolves with fashion, offering endless opportunities for creativity and growth. Mastery requires dedication, continuous learning, and a passion for precision and artistry.
Final Tips for Mastering Tailoring
Mastering tailoring requires consistent practice, patience, and attention to detail. Start by refining your measuring and cutting skills, as accuracy is key to achieving flawless fits. Invest in quality tools and understand fabric types to ensure professional results. Practice handwork and embellishments to elevate your creations. Learn from mistakes and embrace continuous learning to stay updated with trends. Building a portfolio of your work will help showcase your progress and attract clients. Finally, stay passionate about the craft, as tailoring is both an art and a skill that evolves with dedication and creativity.
The Future of Tailoring in Fashion
The future of tailoring in fashion lies in blending traditional craftsmanship with modern technology and sustainable practices. As demand for personalized clothing grows, tailoring is evolving to offer bespoke designs that cater to individual preferences. Advances in 3D design and automation are streamlining the process, while eco-friendly fabrics are becoming increasingly popular; Customization and cultural influences, such as African prints, are also shaping the industry. With a focus on quality over quantity, tailoring is poised to remain a cornerstone of fashion, ensuring garments are both functional and stylish for years to come.
Encouragement for Continuous Learning
Continuous learning is essential for mastering tailoring, as it allows you to refine skills, explore new techniques, and stay updated with fashion trends. Embrace challenges and practice regularly to build confidence and precision. Seek formal training or workshops to deepen your understanding of fabric, fit, and craftsmanship. Experiment with different materials and styles to expand your creative horizons. Learning is a lifelong journey, and every project offers an opportunity to grow. Stay inspired by the work of other tailors and push yourself to innovate. With dedication and curiosity, you can elevate your craft and create garments that truly stand out.