Rock n’ roll dancing gigs are vibrant celebrations of energy, music, and moves․ From lively parties to nostalgic 50s-themed events, the gig guide helps you find the perfect spot to groove, ensuring an unforgettable experience and keeping the spirit alive․
What is Rock n Roll Dance?
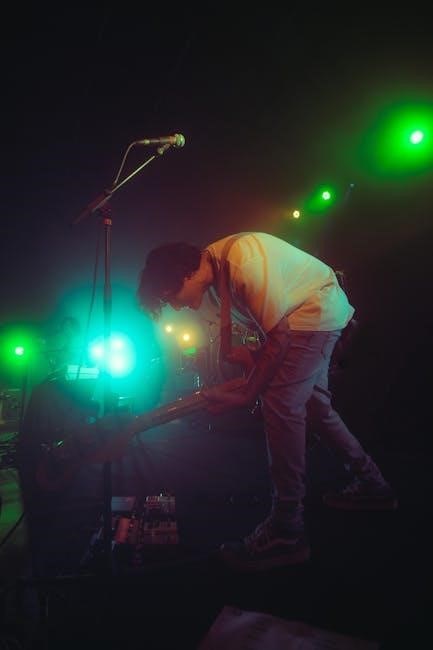
Rock n’ roll dance is a high-energy, dynamic style that originated in the 1950s, closely tied to the vibrant rhythms of rock music․ Characterized by its acrobatic moves, spins, and lively kicks, it reflects the rebellious and carefree spirit of the era․ The dance often involves quick footwork, flips, and partner lifts, making it both thrilling to perform and watch․ Rock n’ roll dance has evolved over the decades, blending elements from other styles while maintaining its core energy․ It is typically performed to fast-paced music, creating an electrifying atmosphere․ Whether at a retro-themed party or a modern dance event, rock n’ roll dance continues to captivate audiences with its infectious enthusiasm and timeless appeal․ Its adaptability and universal charm have made it a staple in dance culture worldwide, bridging generations and inspiring new enthusiasts to embrace its lively spirit․
History and Evolution of Rock n Roll Dance

Rock n’ roll dance traces its roots to the 1950s, emerging alongside the vibrant rock music scene․ It evolved from a mix of swing, jitterbug, and boogie-woogie styles, reflecting the rebellious and energetic spirit of the era․ The dance gained popularity in the 1950s and 1960s, becoming a symbol of youth culture and freedom․ Over the decades, it incorporated elements from other dance styles, such as acrobatics and lifts, while maintaining its signature high-energy rhythm․ Today, rock n’ roll dance continues to thrive, with its infectious beats and dynamic moves captivating audiences at events like the Sun City Oro Valley dance club and the 1950s-themed parties at La Plaza․ Its evolution is a testament to its adaptability and enduring appeal, bridging generations and keeping the spirit of rock n’ roll alive in modern times․
Popular Rock n Roll Dance Styles
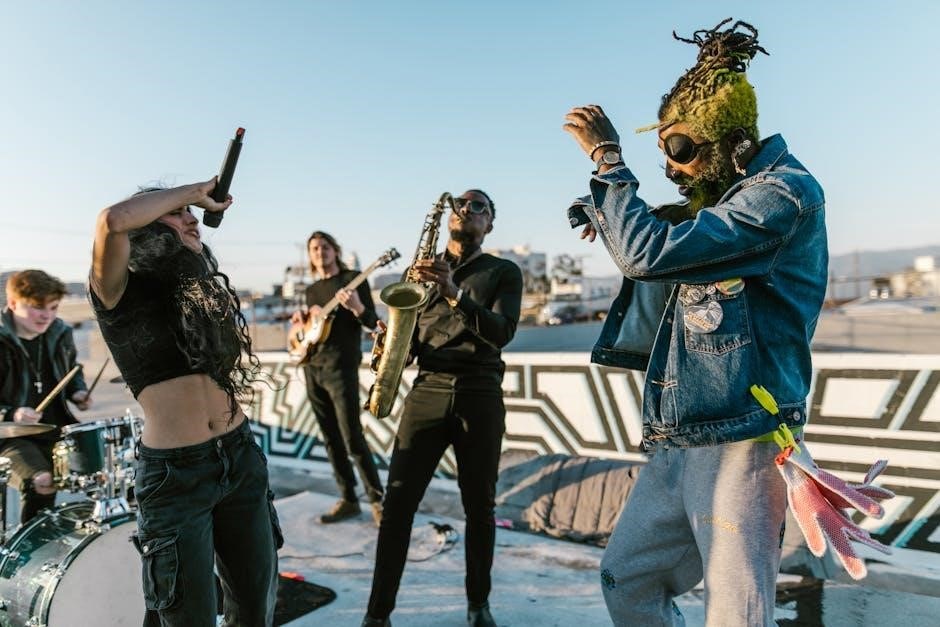
Rock n’ roll dancing encompasses a variety of vibrant styles that have captivated audiences worldwide․ One of the most iconic is the Rockabilly, a fusion of rock and country influences, characterized by dynamic kicks and spins․ Another popular style is the East Coast Swing, which blends elements of Lindy Hop and Jitterbug, offering a more structured yet energetic approach․ Additionally, the Jitterbug remains a crowd favorite, known for its bouncy rhythm and carefree spirit․ Modern rock n’ roll dance has also evolved to include acrobatic moves, adding a thrilling dimension to performances․ These styles are often showcased at events like the 1950s Rock n Roll Dance Party at La Plaza, where enthusiasts gather to dance the night away․ Whether you’re a beginner or a seasoned dancer, the diverse styles of rock n’ roll ensure an unforgettable experience, making it a timeless favorite at gigs and parties alike․
Gig Guide Essentials
Rock n’ roll dance gigs blend energetic performances, vibrant venues, and nostalgic vibes․ From Sun City Oro Valley’s dance parties to Tempe’s PARADOX Arizona events, these essentials guide you to unforgettable experiences․
How to Find Rock n Roll Dance Gigs Near You
Finding rock n’ roll dance gigs near you is easier than ever! Start by checking online event platforms like local dance club websites or social media groups․ Sun City Oro Valley’s “That Old Time Rock and Roll Dance Party” is a great example, offering regular events for enthusiasts; Additionally, venues like La Plaza in Tempe host themed parties with beginner lessons, making them perfect for newcomers․ Follow local dance communities, sign up for newsletters, and use event discovery apps to stay updated․ Many cities also have dedicated rock n’ roll dance clubs that organize weekly or monthly gatherings․ Don’t forget to explore local newspapers or community boards for flyers advertising these events․ With a little effort, you’ll be dancing to the beat of rock n’ roll in no time!
Top Rock n Roll Dance Venues

Best Times to Attend Rock n Roll Dance Events
Preparing for a Rock n Roll Dance Gig
Prepare for rock n’ roll dance gigs with retro attire, essential gear, and beginner-friendly dance lessons, ensuring a vibrant and energetic experience at every event․

What to Wear: Rock n Roll Dance Attire

Rock n’ roll dance attire is all about embracing the retro vibe of the 1950s․ Opt for bold, colorful outfits with leather jackets, high-waisted jeans, and vibrant dresses that reflect the era’s rebellious spirit․ Comfortable yet stylish footwear, like saddle shoes or retro sneakers, is essential for energetic dancing․ Accessories such as scarves, bandanas, and vintage-inspired jewelry can add a unique touch․ For themed events, consider outfits that match the specific decade or style, ensuring you stand out on the dance floor․ At venues like Sun City Oro Valley or La Plaza, where retro parties are popular, dressing the part enhances the overall experience․ The key is to blend style with practicality, allowing freedom of movement while capturing the iconic look of rock n’ roll culture․
Essential Gear for Rock n Roll Dancing
When preparing for a rock n’ roll dance gig, having the right gear ensures a fun and comfortable experience․ Start with sturdy, lightweight dance shoes, preferably with non-marking soles to protect venue floors․ Comfortable, breathable clothing like cotton or stretch fabrics allows for unrestricted movement․ Bring a sweat towel and water bottle to stay hydrated during high-energy sessions․ For outdoor events, pack sunscreen, a hat, or a lightweight jacket, depending on the weather․ A portable phone charger is handy for capturing memories or navigating gig locations․ Don’t forget a small first-aid kit for minor scrapes or blisters․ At venues like Sun City Oro Valley or Tempe, where events like the Rock n Roll Arizona race week take place, being prepared ensures you can fully immerse yourself in the vibrant atmosphere․ The right gear keeps you dancing all day long!
Event Highlights
Experience the vibrant atmosphere at Sun City Oro Valley’s rock n’ roll dance parties and Tempe’s PARADOX Rock n Roll Arizona race week, featuring energetic performances and unforgettable dance sessions․
Upcoming Rock n Roll Dance Events in 2025
2025 promises an exciting lineup of rock n’ roll dance events, starting with the PARADOX Rock n Roll Arizona race week in Tempe, featuring three races and lively performances․ Sun City Oro Valley’s “That Old Time Rock and Roll Dance Party” continues to draw crowds with its energetic vibe․ Additionally, La Plaza’s 1950s Rock n Roll Dance Party, complete with a beginner lesson, is set to transport participants back in time․ These events showcase the enduring appeal of rock n’ roll, blending music, dance, and nostalgia․ Whether you’re a seasoned dancer or a newcomer, there’s something for everyone․ Mark your calendars for January 18-19, 2025, and June 28, 2025, to experience these unforgettable gatherings․ Don’t miss out on the chance to dance the night away and connect with fellow rock n’ roll enthusiasts․ Secure your spot early as these events are expected to fill up quickly!

Rock n Roll Arizona Race Week Highlights
The Rock n Roll Arizona Race Week in Tempe, set for January 18-19, 2025, is a standout event that combines fitness with the vibrant spirit of rock n’ roll․ Featuring three races, including a half marathon, this event draws athletes and music lovers alike․ The PARADOX Rock n Roll Arizona race week is part of the Rock n Roll Running Series, which recently introduced an Elite Series, adding prestige to the competition․ Beyond the races, the event showcases live music performances and dancing, creating a lively atmosphere․ Participants and spectators can enjoy the fusion of physical activity and rock n’ roll culture․ This event is a must-attend for anyone looking to experience the energy of rock n’ roll while staying active․ Mark your calendars for an unforgettable weekend in Tempe, blending fitness, music, and community․