texas caterpillar identification chart pdf

Texas’s diverse ecosystems host a wide variety of caterpillar species, essential for understanding local biodiversity. This guide provides a structured approach to identifying caterpillars using visual and behavioral cues, aiding both enthusiasts and researchers in recognizing species effectively.

1.1 Importance of Caterpillar Identification in Texas

Identifying caterpillars in Texas is crucial for understanding their ecological roles and managing potential pest species. Many caterpillars are beneficial, pollinating plants or serving as food sources for wildlife, while others can damage crops. Accurate identification helps prevent infestations, protect biodiversity, and support conservation efforts. Rare or endangered species, like the Ascia monuste, highlight the need for precise identification to ensure their survival and habitat protection. This knowledge aids researchers, farmers, and enthusiasts in maintaining Texas’s rich ecosystem balance.

How to Identify Caterpillars in Texas

Examine caterpillar size, color, and body features, then cross-reference with host plants and seasonal activity using visual guides like the Texas Caterpillar Identification Chart for accuracy.

2.1 Key Characteristics for Caterpillar Identification

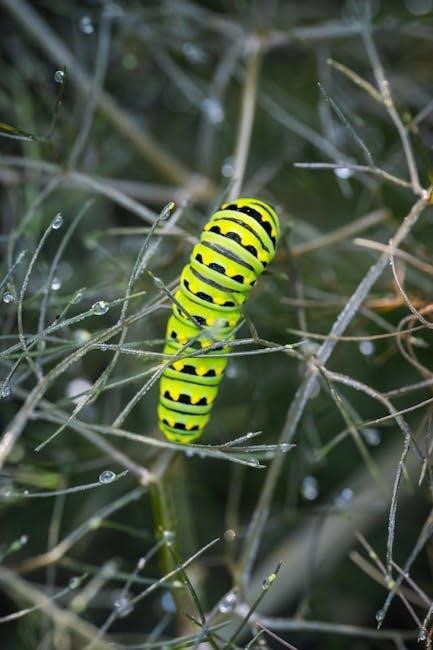
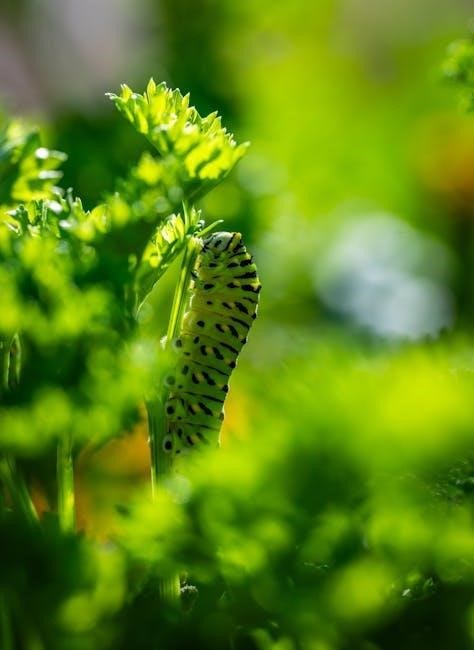
Identifying caterpillars in Texas involves observing size, color, and distinct body features like horns, spines, or stripes. Note the presence of instars, as these stages reveal developmental traits. Consult the Texas Caterpillar Identification Chart for detailed images and descriptions, matching your specimen to its species. Pay attention to host plants, as caterpillars often associate with specific vegetation. Documenting these characteristics ensures accurate identification and enhances understanding of their ecological roles in the region.

2.2 Behavior and Habitat Clues for Identification

Caterpillar behavior and habitat preferences are crucial for identification. Many species exhibit unique feeding patterns, such as leaf-rolling or stem-boring, while others are known for their migratory behaviors. Habitat clues include the type of vegetation, soil conditions, and seasonal activity. For instance, certain caterpillars thrive in open grasslands, while others prefer wooded areas. Observing these ecological preferences, as outlined in the Texas Caterpillar Identification Chart, helps narrow down species and ensures accurate identification in the field.

Texas Caterpillar Identification Chart Overview

The Texas Caterpillar Identification Chart is a visual and descriptive guide, aiding enthusiasts and researchers in recognizing species through detailed imagery and life cycle information.

3.1 Structure and Features of the Chart

The chart organizes caterpillar species by family and habitat, featuring high-quality images, descriptions of key characteristics, and life cycle stages. It includes host plant associations and regional distribution maps, aiding accurate identification. Each entry highlights distinctive markings, behaviors, and seasonal activity, making it a comprehensive tool for both enthusiasts and researchers. The chart’s user-friendly layout and detailed annotations ensure ease of use for identifying caterpillars across Texas’s diverse ecosystems.

Common Caterpillar Species in Texas

Texas hosts a variety of caterpillar species, many of which are economically significant. Common species include those feeding on grasses, shrubs, and crops, adapting to diverse habitats across the state.

4;1 Most Frequently Encountered Species

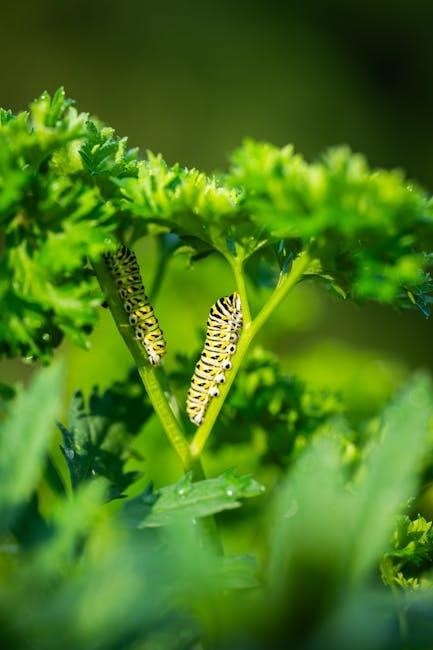
The most commonly seen caterpillars in Texas include species like the Tobacco Hornworm and Tomato Hornworm, which are known for their vibrant colors and distinct markings. These caterpillars often feed on plants in gardens and agricultural fields, making them frequent encounters for farmers and gardeners. Additionally, species like the Io Moth Caterpillar and Eastern Tent Caterpillar are widespread due to their adaptability to various host plants. Their presence is often noticeable during peak seasons, making them key subjects in local biodiversity studies.

4.2 Rare or Endangered Species in Texas

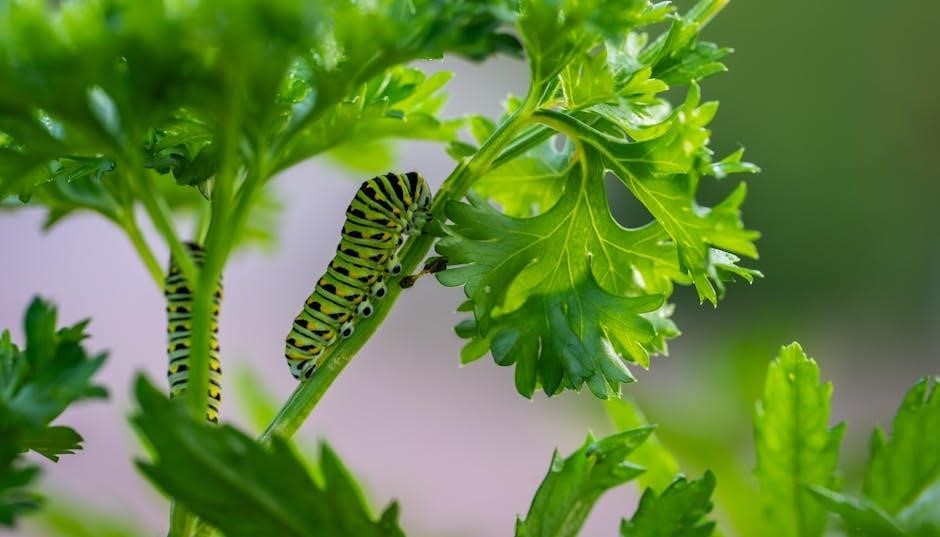
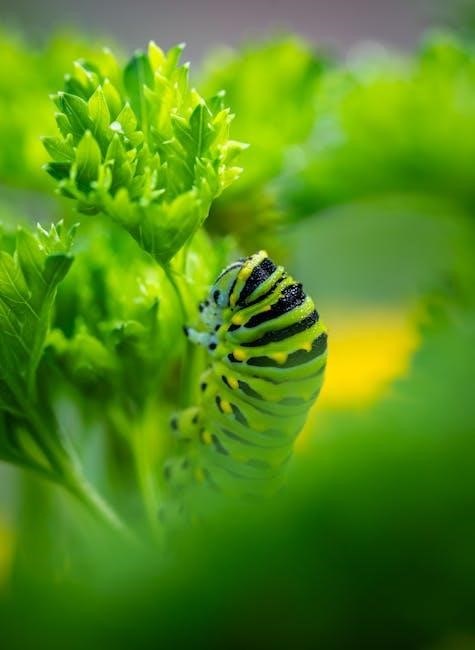
Texas is home to several rare and endangered caterpillar species, such as the Regal Moth Caterpillar, which is seldom spotted due to its specific habitat requirements. The Giant Swallowtail Caterpillar is another rare species, primarily found in limited regions of southern Texas. Conservation efforts are essential to protect these species, as their populations are threatened by habitat loss and environmental changes. Identifying these species requires careful observation and knowledge of their unique characteristics and habitats.

Regional Variations in Caterpillar Species

Texas’s diverse geography supports varied caterpillar species across regions, with northern forests, central plains, and southern wetlands hosting distinct populations shaped by climate and vegetation differences.

5.1 Species Found in Northern Texas

Northern Texas is home to caterpillars like the Walnut Caterpillar and Pecan Caterpillar, which thrive on deciduous trees. The region’s cooler climate supports species adapted to temperate forests, with distinct feeding habits and seasonal activity. These caterpillars are often less colorful than their southern counterparts, blending into the foliage for camouflage. Understanding their specific host plants and habitats aids in accurate identification using regional charts and guides.

5.2 Species Found in Southern Texas

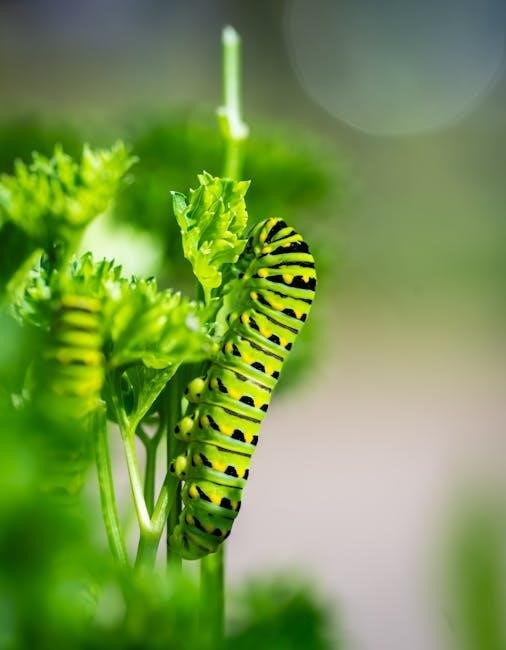
Southern Texas hosts a variety of caterpillars adapted to its subtropical climate, such as the Gulf Fritillary and Gray Hairstreak. These species often feed on plants like passionflower and weeds, thriving in the region’s warm conditions. The area’s unique biodiversity supports caterpillars with vibrant colors and distinct patterns, making them easier to identify. Regional charts highlight these species, aiding in distinguishing them from others based on habitat and feeding behaviors.

Using the Texas Caterpillar Identification Chart

The chart simplifies identification by categorizing caterpillars based on visual descriptions and habitat clues, enabling quick and accurate recognition of species found in Texas.

6.1 Step-by-Step Guide to Using the Chart

To use the Texas Caterpillar Identification Chart effectively, start by observing the caterpillar’s size, color, and distinctive features. Note its habitat and behavior, as these clues can narrow down species. Next, match these observations with the chart’s visual descriptions and images. Use the filtering options to refine your search by instar stages or host plants. Compare your findings with detailed species profiles to confirm identification. If unsure, consult additional resources or experts for verification.

Conservation and Safety Tips

Handle caterpillars gently to avoid harm. Wear gloves for species with urticating hairs. Protect habitats by preserving host plants and natural environments. Avoid disturbing caterpillars during critical life stages.

7.1 Safe Handling of Caterpillars

When handling caterpillars, wear protective gloves to avoid skin irritation from urticating hairs. Gently pick them up, ensuring not to squeeze or harm them. Avoid touching your face or eyes after handling. Some species, like the Io moth caterpillar, can cause painful stings. Use a soft brush or container to transfer caterpillars safely. Handle them briefly to prevent stress and release them in their natural habitat to support conservation efforts and maintain ecosystem balance.

7.2 Protecting Caterpillar Habitats

Protecting caterpillar habitats is crucial for maintaining biodiversity. Preserve natural environments, including meadows and forests, by reducing pesticide use and promoting sustainable land management. Plant native vegetation to provide food and shelter for caterpillars. Avoid disrupting ecosystems during development projects. Educate communities about the importance of conservation efforts. By safeguarding habitats, we ensure the survival of caterpillar species and support the overall health of Texas’s ecosystems for future generations.

Advanced Identification Techniques

Advanced methods like DNA analysis, AI-powered apps, and specialized software enhance caterpillar identification accuracy. These tools aid researchers and enthusiasts in quickly recognizing species, ensuring precise classifications.

8.1 Using Technology for Caterpillar Identification

Technology has revolutionized caterpillar identification, offering tools like AI-powered apps and digital field guides. Machine learning algorithms analyze images for quick species recognition. Online databases provide access to extensive catalogs, enabling precise matchups. Apps with image recognition capabilities, such as iNaturalist, simplify identification for enthusiasts. Additionally, digital microscopy tools allow for detailed examination of tiny features. These advancements enhance accuracy and efficiency, making caterpillar identification more accessible for both experts and hobbyists across Texas.

Seasonal Caterpillar Activity in Texas

Caterpillar activity in Texas varies by season, with peaks in spring and summer. Warmer months promote feeding and molting, while cooler seasons see dormancy or reduced visibility, aiding identification efforts.

9.1 Caterpillar Life Cycles and Seasonal Changes

Caterpillar life cycles in Texas are closely tied to seasonal changes. Most species hatch in spring, feed actively during summer, and pupate in fall. Adults emerge in spring, restarting the cycle. Seasonal variations influence feeding behavior, with warmer months promoting rapid growth. Understanding these cycles aids in identification, as certain species are more visible during specific times of the year. This knowledge also helps in monitoring and protecting these insects amid Texas’s diverse climate zones.

Resources for Further Learning

Explore detailed field guides and websites for in-depth caterpillar identification. These resources offer charts, species descriptions, and expert tips to enhance your knowledge and identification skills effectively.

10.1 Recommended Field Guides and Websites

For deeper exploration, consult field guides like “Caterpillars of Texas” and websites such as BugGuide.net. These resources provide detailed species descriptions, high-quality images, and identification tools. Additionally, platforms like iNaturalist offer community-driven insights and AI-powered identification assistance. Utilize these resources to enhance your knowledge and refine your identification skills, ensuring accurate and informed caterpillar recognition in Texas ecosystems.

hotpoint washing machine troubleshooting guide

This comprehensive guide covers common issues, error codes, and maintenance tips for Hotpoint washing machines. It helps both new and experienced users troubleshoot and resolve problems effectively, ensuring optimal performance and extending the appliance’s lifespan.

Welcome to the Hotpoint Washing Machine Troubleshooting Guide, designed to help you resolve common issues efficiently. This guide covers error codes, maintenance tips, and solutions for problems like uneven spinning, drainage issues, and unexpected noises. Whether you’re dealing with a machine that won’t turn on or persistent vibrations, this guide provides step-by-step advice to get your appliance running smoothly. By addressing problems early, you can extend the lifespan of your washing machine and ensure optimal performance. Regular maintenance and understanding error codes are key to troubleshooting effectively.

Common Issues and Solutions

Address frequent problems like the washing machine not spinning, shaking, or draining. Solutions often involve checking the pump filter, ensuring a balanced load, and verifying water supply.

2.1. Washing Machine Not Spinning

If your Hotpoint washing machine isn’t spinning, check the pump filter for blockages, as debris like coins or fabric can prevent proper drainage. Ensure the drain hose isn’t kinked or clogged. Verify the load is balanced, as an uneven distribution can disrupt spinning. If issues persist, inspect the belt or motor for wear. Resetting the machine or running a diagnostic test may also resolve the problem. If none of these steps work, professional assistance may be required to address internal component failures.

2.2. Washing Machine Shaking or Vibrating

If your Hotpoint washing machine is shaking or vibrating excessively, ensure it is installed on a stable, level surface. Check that the machine isn’t trapped between cabinets or walls, as this can cause imbalance. Verify the drain hose isn’t blocked or improperly connected. A poorly balanced load can also cause vibrations, so redistribute clothes evenly. Inspect the shock absorbers or springs for wear. If issues persist, run a diagnostic test or reset the machine. Ensuring proper installation and maintenance can help minimize vibrations and ensure smooth operation.

2.3. Washing Machine Not Draining

If your Hotpoint washing machine isn’t draining, check the pump filter for blockages. Remove and clean it regularly to ensure proper water flow. Inspect the drain hose for kinks or obstructions and ensure it’s properly connected. A clogged drain pipe or faulty pump can also cause this issue. Run a diagnostic test to identify error codes. If the problem persists, reset the machine or consult a professional. Regular maintenance, like cleaning the filter and checking connections, can prevent drainage issues and keep your machine running smoothly.

2.4. Washing Machine Won’t Turn On

If your Hotpoint washing machine won’t turn on, start by checking the power supply. Ensure the plug is securely connected and the outlet is functioning. Verify that the child lock feature isn’t activated. Check for blown fuses or tripped circuit breakers. If the display is unresponsive, reset the machine by unplugging it for 30 minutes. If these steps don’t work, there might be an issue with the power board or motor. Consult the user manual or contact a technician for advanced troubleshooting to resolve the problem effectively.

Understanding Error Codes

This section explains common Hotpoint washing machine error codes like F01, F02, and F03, providing insights into their meanings and solutions for quick troubleshooting and repair.

3.1. Common Hotpoint Washing Machine Error Codes (F01, F02, F03, etc.)

Hotpoint washing machines display error codes like F01, F02, and F03 to indicate specific issues. F01 often relates to electronic control system faults, while F02 signifies a drainage problem. F03 may point to a heating issue. Other codes like E1 and E2 indicate problems with the water supply or lid closure. Understanding these codes helps diagnose issues quickly. Regular maintenance, such as checking the pump filter and drain hose, can prevent many of these errors. Refer to the user manual for detailed explanations and solutions to restore your machine’s functionality efficiently.

3.2. How to Identify and Interpret Error Codes

To identify and interpret Hotpoint washing machine error codes, start by checking the display for flashing lights or codes like F01, F02, or E1. Refer to the user manual for specific code meanings, as these vary by model. Common issues include drainage problems, sensor malfunctions, or incorrect lid closure. Basic checks, such as ensuring the lid is closed or the drain isn’t blocked, can often resolve the issue. For complex codes, resetting the machine or running a diagnostic test may help. If problems persist, consult a professional technician for further assistance.

Troubleshooting Specific Problems

Address specific issues like wet clothes after spin, noisy operation, leaks, or unpleasant odors with targeted solutions. Each problem is analyzed with practical fixes and expert advice.

4.1. Clothes Left Wet After Spin Cycle

Clothes remaining wet after the spin cycle can indicate issues with drainage or spin functionality. Check for blockages in the drain hose or pump filter, as these can prevent proper water removal. Ensure the washing machine is properly balanced to allow the spin cycle to function effectively. If the problem persists, inspect the pump for damage or debris buildup. Additionally, verify that the drain hose is correctly installed and not kinked. Addressing these factors should resolve the issue and ensure clothes are thoroughly dried during the cycle.

4.2. Noisy or Unstable Operation

A noisy or unstable washing machine can result from poor installation, an unbalanced load, or worn parts. Ensure the appliance is level and placed on a sturdy floor. Check for loose components or debris inside the drum. An unbalanced load, especially with bulky items, can cause vibrations. Inspect the motor or belt for wear and tear. If noise persists, clean the pump filter or drain hose, as blockages may disrupt operation. Addressing these factors will help restore smooth and quiet functionality to your Hotpoint washing machine.

4.3. Leaking Issues

Leaking from your Hotpoint washing machine can be caused by a blocked drain hose, damaged door seal, or loose water inlet connections. Regularly inspect the pump filter for debris, as blockages can lead to water leakage. Check the door seal for damage or mold buildup, ensuring it is clean and properly aligned. Verify that all hoses are securely connected and not cracked. If leaks persist, consult the user manual or error code guide for specific fault indicators like E1 or E2, which often relate to drainage or water supply issues. Addressing these problems promptly prevents further damage.

4.4. Unpleasant Odors

Unpleasant odors in your Hotpoint washing machine can result from mold buildup, detergent residue, or stagnant water. Regular cleaning of the drum and gasket is essential to prevent bacterial growth. Leave the machine door open after use to allow drying. Run a hot water cycle without detergent to sanitize the interior. Check for blockages in the drain hose, as water retention can exacerbate odors. If the smell persists, clean the pump filter and ensure proper ventilation. Addressing odor issues promptly prevents long-term damage and maintains hygiene.

Advanced Troubleshooting Techniques

Advanced troubleshooting involves checking the pump filter, inspecting the drain hose, and verifying water supply. These steps help identify and resolve deeper issues efficiently.

5.1. Checking the Pump Filter

Checking the pump filter is crucial for resolving drainage issues. Regularly inspect and clean the filter to remove blockages like lint or debris. Ensure it’s securely replaced after cleaning. A clogged filter can cause poor drainage or loud noises; Refer to your user manual for specific instructions, as filter locations may vary by model. This simple maintenance step can prevent major problems and keep your washing machine running smoothly.

5.2. Inspecting the Drain Hose

Inspecting the drain hose is essential to ensure proper water flow and prevent leaks. Check for kinks, twists, or blockages that may restrict drainage. Ensure the hose is securely connected to both the washing machine and the drainpipe. Avoid over-tightening, as this could damage the hose. If you find any damage or cracks, replace the hose immediately. Regularly cleaning the drain hose can prevent buildup and maintain efficient operation. Refer to your user manual for specific guidance on inspecting and maintaining your Hotpoint washing machine’s drain hose effectively.

5.3. Verifying Water Supply

Ensure the water supply hoses are not kinked or twisted, as this can restrict water flow. Check that the taps supplying hot and cold water are fully open. Inspect the hoses for blockages, mineral buildup, or damage. If damaged, replace the hoses immediately. Verify that the washing machine is receiving adequate water pressure. Secure all connections to prevent leaks. Regularly cleaning the water inlet filters can also improve water flow. If issues persist, consult a professional to assess your home’s water supply system for any underlying problems affecting your Hotpoint washing machine’s performance.

Preventive Maintenance Tips

Regularly clean the drum and gasket to prevent mold. Balance loads to avoid vibration. Run diagnostic tests and check the pump filter. Leave the door open to dry. Inspect hoses for damage to prevent leaks. Maintain proper water supply and ensure hoses are secure to avoid issues. Regular maintenance extends the machine’s lifespan and ensures optimal performance. Schedule routine checks to identify and address potential problems before they escalate. Keep your Hotpoint washing machine in top condition with these simple, effective tips. Always refer to the user manual for specific guidance. Ensure all parts are clean and functioning correctly. Replace worn or damaged components promptly. Monitor for unusual noises or smells, as they can indicate underlying issues; By following these tips, you can enjoy reliable and efficient laundry operations. Proper care and attention will keep your Hotpoint washing machine running smoothly for years. Always prioritize safety and follow manufacturer recommendations for maintenance and repairs. This will help maintain warranty validity and ensure your appliance continues to perform at its best. Regularly cleaning the detergent drawer and checking for blockages in the drain hose can also improve performance. Familiarize yourself with the troubleshooting guide to address minor issues quickly. Preventive maintenance is key to avoiding costly repairs and downtime. Stay proactive and keep your Hotpoint washing machine in excellent working order. Consistent upkeep will save time and money in the long run, ensuring your appliance remains a reliable and essential part of your household. Always stay informed about the latest maintenance advice and product updates from Hotpoint. This will help you make the most of your appliance and keep it running efficiently. Remember, a well-maintained washing machine is not only more efficient but also lasts longer, providing better value for your investment. Dedicate a few minutes each month to inspect and maintain your machine, and it will reward you with consistent performance. Keep track of the recommended maintenance schedule outlined in the user manual to stay on top of necessary tasks. Addressing minor issues promptly can prevent them from developing into major problems. Hotpoint washing machines are designed to deliver great results, and with proper care, they will continue to meet your expectations. Always use genuine parts and follow the manufacturer’s instructions for any repairs or replacements. This ensures compatibility and maintains the quality of your appliance. By prioritizing preventive maintenance, you can enjoy a hassle-free experience with your Hotpoint washing machine. Regular checks and simple tasks can make a significant difference in its performance and longevity. Stay committed to maintaining your appliance, and it will continue to serve you well for many years. Always remember that prevention is better than repair, especially when it comes to your Hotpoint washing machine. Take the time to care for it, and it will take care of your laundry needs effortlessly. Proper maintenance not only extends the lifespan of your appliance but also ensures it operates safely and efficiently. Keep your Hotpoint washing machine in prime condition with these essential preventive maintenance tips. By doing so, you’ll enjoy a reliable and high-performing appliance that meets all your laundry demands. Always refer back to this guide for detailed instructions and advice on maintaining your Hotpoint washing machine. Together, these tips will help you get the most out of your appliance and keep it running smoothly for years to come. Regular maintenance is the cornerstone of a long-lasting and efficient Hotpoint washing machine. Stay informed, stay proactive, and your appliance will reward you with consistent performance and reliability. Always remember that a well-maintained machine is a happy machine. Keep these tips in mind and enjoy a trouble-free experience with your Hotpoint washing machine. Proper care and attention will ensure it remains a vital and dependable part of your daily routine. Always prioritize preventive maintenance to keep your Hotpoint washing machine in excellent working order. This comprehensive guide provides all the necessary tips and advice to help you maintain your appliance effectively. By following these simple steps, you can extend the life of your machine and ensure it continues to perform at its best. Regular maintenance is essential for optimal performance and longevity. Stay dedicated to caring for your Hotpoint washing machine, and it will continue to serve you faithfully. Always keep these preventive tips in mind to maintain your appliance in top condition. A well-maintained Hotpoint washing machine is not only efficient but also durable, providing years of reliable service. Always refer to this guide for expert advice on keeping your appliance in prime working order. By committing to regular maintenance, you’ll ensure your Hotpoint washing machine remains a trusted and essential part of your household for years to come. Always remember, a little care goes a long way in preserving the performance and longevity of your appliance. Stay proactive with these preventive tips and keep your Hotpoint washing machine running smoothly. Regular maintenance is the key to a happy and healthy washing machine. Always take the time to inspect and maintain your appliance, and it will reward you with consistent and reliable performance. Proper care ensures your Hotpoint washing machine continues to meet your needs effectively. Always stay informed and follow the recommended maintenance schedule to keep your appliance in excellent condition. By doing so, you’ll enjoy a hassle-free experience and extend the lifespan of your machine. Regular checks and simple maintenance tasks can make a significant difference in the performance and longevity of your Hotpoint washing machine. Always prioritize preventive care to ensure your appliance remains in top working order. This guide provides all the necessary tips to help you maintain your Hotpoint washing machine effectively. By following these steps, you’ll enjoy a reliable and efficient appliance for years to come. Always remember, preventive maintenance is the best way to avoid costly repairs and ensure your machine runs smoothly. Keep your Hotpoint washing machine in great shape with these essential tips and advice. Regular maintenance is crucial for optimal performance and longevity. Always take the time to care for your appliance, and it will continue to serve you well. Stay proactive with these preventive tips and ensure your Hotpoint washing machine remains a dependable part of your household. Always refer to this guide for expert advice on maintaining your appliance in prime condition. By committing to regular maintenance, you’ll extend the life of your machine and ensure it continues to perform at its best. A well-maintained Hotpoint washing machine is both efficient and durable, providing years of reliable service. Always remember that preventive care is essential for maintaining the performance and longevity of your appliance. Stay informed and follow the recommended maintenance schedule to keep your machine running smoothly. Regular checks and simple tasks can make a significant difference in the overall performance of your Hotpoint washing machine. Always prioritize preventive maintenance to ensure your appliance remains in top working order. This comprehensive guide provides all the necessary tips and advice to help you maintain your Hotpoint washing machine effectively. By following these simple steps, you can extend the life of your machine and ensure it continues to perform at its best. Regular maintenance is essential for optimal performance and longevity. Stay dedicated to caring for your Hotpoint washing machine, and it will continue to serve you faithfully. Always keep these preventive tips in mind to maintain your appliance in top condition. A well-maintained Hotpoint washing machine is not only efficient but also durable, providing years of reliable service. Always refer to this guide for expert advice on keeping your appliance in prime working order. By committing to regular maintenance, you’ll ensure your Hotpoint washing machine remains a trusted and essential part of your household for years to come. Always remember, a little care goes a long way in preserving the performance and longevity of your appliance. Stay proactive with these preventive tips and keep your Hotpoint washing machine running smoothly. Regular maintenance is the key to a happy and healthy washing machine. Always take the time to inspect and maintain your appliance, and it will reward you with consistent and reliable performance. Proper care ensures your Hotpoint washing machine continues to meet your needs effectively. Always stay informed and follow the recommended maintenance schedule to keep your appliance in excellent condition. By doing so, you’ll enjoy a hassle-free experience and extend the lifespan of your machine. Regular checks and simple maintenance tasks can make a significant difference in the performance and longevity of your Hotpoint washing machine. Always prioritize preventive care to ensure your appliance remains in top working order. This guide provides all the necessary tips to help you maintain your Hotpoint washing machine effectively. By following these steps, you’ll enjoy a reliable and efficient appliance for years to come. Always remember, preventive maintenance is the best way to avoid costly repairs and ensure your machine runs smoothly. Keep your Hotpoint washing machine in great shape with these essential tips and advice. Regular maintenance is crucial for optimal performance and longevity. Always take the time to care for your appliance, and it will continue to serve you well. Stay proactive with these preventive tips and ensure your Hotpoint washing machine remains a dependable part of your household. Always refer to this guide for expert advice on maintaining your appliance in prime condition. By committing to regular maintenance, you’ll extend the life of your machine and ensure it continues to perform at its best. A well-maintained Hotpoint

Professional Assistance

6.1. Regular Cleaning of the Drum and Gasket

Regular cleaning of the drum and gasket is essential to prevent mold, mildew, and unpleasant odors. After each use, leave the door open to allow the interior to dry. Run a cleaning cycle or a hot water wash with a detergent booster to remove residue. Manually wipe the gasket and drum with a damp cloth to eliminate visible debris. Check for blockages in the drain pump filter, as these can cause drainage issues; Regular cleaning ensures fresh laundry and prevents bacterial growth. It also helps maintain optimal performance and extends the lifespan of your Hotpoint washing machine. Consistency is key to keeping your appliance hygienic and efficient.

lux tx9600ts manual

The Lux TX9600TS is a 7-day programmable touchscreen thermostat designed for precise temperature control. It offers advanced features like energy efficiency and a user-friendly interface for seamless operation.

Key Features and Benefits

The Lux TX9600TS features a 7-day programmable schedule‚ touchscreen display‚ and energy-saving modes. It offers precise temperature control‚ reducing energy consumption and enhancing comfort.

2.1. Touchscreen Display

The Lux TX9600TS boasts an intuitive 7-inch full-color touchscreen display‚ simplifying navigation through its menu. The high-resolution interface allows for easy programming and quick adjustments‚ enhancing user experience.

2.2. 7-Day Programmability

The Lux TX9600TS offers 7-day programmability‚ enabling users to set different temperature schedules for each day. This feature allows for customized comfort and energy savings‚ with up to six daily settings. Additionally‚ the thermostat supports both heating and cooling modes‚ providing flexibility. The programmable functionality ensures that your home maintains optimal temperatures throughout the week‚ aligning with your lifestyle. This feature is particularly beneficial for homeowners with irregular schedules‚ as it allows precise control over energy usage. The intuitive interface makes it easy to program and adjust settings‚ ensuring maximum efficiency and comfort year-round. The TX9600TS also retains programmed settings during power outages‚ eliminating the need to reprogram after a restart.

2.3. Energy Efficiency Features

The Lux TX9600TS incorporates advanced energy efficiency features to help reduce energy consumption and lower utility bills. It includes an energy-saving mode that optimizes heating and cooling usage. The thermostat also features smart recovery‚ which learns your system’s operation to pre-heat or pre-cool your home efficiently. Additionally‚ the TX9600TS supports energy-saving setpoints‚ allowing you to program specific temperature ranges for peak and off-peak times. This ensures your HVAC system operates efficiently without compromising comfort. The thermostat also includes a vacation mode‚ enabling extended energy savings when you’re away from home. These features make the TX9600TS an eco-friendly choice for modern homes‚ promoting sustainability while maintaining optimal comfort levels year-round.

Installation Instructions

Install the Lux TX9600TS by first reading the manual thoroughly‚ labeling existing wires‚ and ensuring power is turned off. Follow step-by-step guide for a safe setup.

3.1. Pre-Installation Checks

Before installing the Lux TX9600TS‚ ensure power is turned off at the circuit breaker. Label all existing wires to avoid confusion during installation. Verify compatibility with your HVAC system and check for any damaged components. Ensure the wall surface is level and clean for proper mounting. Review the manual thoroughly to understand the process and gather necessary tools. These steps ensure a safe and successful installation‚ preventing potential issues down the line.

3.2. Step-by-Step Installation Guide

Turn off power to your HVAC system at the circuit breaker. Remove the old thermostat and label the wires for identification. Mount the new Lux TX9600TS thermostat base to the wall‚ ensuring it is level and secure.

Connect the wires to the appropriate terminals on the new thermostat‚ matching the labels from your old system. Gently push the wires into the wall and attach the base to the wall plate.

Re-enable power at the circuit breaker and test the system by turning on heating or cooling. Use the touchscreen interface to configure basic settings and ensure proper operation. Finally‚ dispose of the old thermostat responsibly.

Operating Instructions

Learn to operate your Lux TX9600TS thermostat with ease. Navigate the touchscreen interface to adjust temperature‚ schedule settings‚ and access advanced features for optimal comfort and energy savings.

  • Touch the screen to wake the thermostat.
  • Use arrows to adjust temperature settings.
  • Access the menu for scheduling and fan control.

4.1. Basic Operations

Mastering the basic operations of your Lux TX9600TS thermostat ensures smooth functionality. Start by touching the screen to wake it up‚ then use the arrows to adjust the temperature. The home screen displays the current temperature‚ setpoint‚ and system status. To change the mode‚ tap the “Mode” icon to switch between Heat‚ Cool‚ or Off. For scheduling‚ press the “Schedule” button to set your 7-day program‚ adjusting times and temperatures as needed. The “Fan” icon allows you to control the fan operation‚ and the “Menu” provides access to advanced settings like energy efficiency features. Regularly review your settings to optimize comfort and energy usage. These basic operations form the foundation for efficient thermostat management.

4.2. Advanced Features

The Lux TX9600TS offers advanced features to enhance convenience and efficiency. One key feature is its compatibility with smart home systems‚ allowing remote control via smartphone apps. The thermostat also includes geofencing technology‚ which adjusts temperatures based on your location. Additionally‚ it provides detailed energy usage reports to help optimize your settings. The adaptive recovery feature ensures the system reaches your desired temperature by the scheduled time. Customizable shortcuts on the touchscreen allow quick access to frequently used settings‚ while the advanced scheduling options enable precise temperature control throughout the day. These features make the Lux TX9600TS a versatile and modern solution for home climate control‚ offering both simplicity and sophistication for users seeking enhanced functionality.

Troubleshooting Common Issues

Address common issues like no fan function in heat mode or connectivity problems by following reset procedures and checking wire connections‚ ensuring optimal thermostat performance.

5.1. No Fan Function in Heat Mode

If the fan fails to operate in heat mode‚ ensure the thermostat is properly configured. Check system settings to confirm the fan is set to ‘Auto’ or ‘On.’ Verify wiring connections‚ especially the fan (G) terminal‚ to ensure they are secure and correct. If issues persist‚ perform a hardware reset by pressing the HW RST button on the circuit board for 5 seconds. This resets the thermostat to factory settings without losing programmed schedules. After resetting‚ reprogram the thermostat and test the fan operation again. Always refer to the user manual for detailed troubleshooting steps specific to the Lux TX9600TS model.

5.2. Hardware Reset Procedure

To perform a hardware reset on the Lux TX9600TS thermostat‚ remove the front cover from the wall; Locate the HW RST button on the circuit board and press it for 10 seconds. Release the button and wait for the thermostat to restart. This process restores factory settings but retains programmed schedules. Reattach the front cover and reprogram any custom settings if necessary. A hardware reset is useful for resolving persistent issues without losing your saved preferences. Always refer to the user manual for detailed instructions specific to your model.

Maintenance Tips

Regularly clean the touchscreen and thermostat surface with a soft cloth. Check and update software if available to ensure optimal performance and functionality over time.

6.1. Cleaning the Thermostat

Regular cleaning ensures optimal performance and longevity of your Lux TX9600TS thermostat. Turn off the power at the circuit breaker before cleaning. Use a soft‚ dry cloth to wipe the touchscreen and exterior surfaces gently. Avoid harsh chemicals‚ abrasive cleaners‚ or liquids‚ as they may damage the display or internal components. For stubborn smudges‚ slightly dampen the cloth with water‚ but ensure it is not soaking wet. Never spray cleaning solutions directly on the thermostat. Clean the vents and openings with compressed air to remove dust. Avoid inserting objects into the vents or openings. Cleaning every few months will maintain functionality and appearance. Always power off the device before cleaning to prevent damage.

6.2. Updating Software (if applicable)

Software updates for the Lux TX9600TS may be available to enhance functionality or fix issues. Check the manufacturer’s website or the thermostat’s manual for update instructions. Ensure your device is compatible with the latest software version. Download the update file from the official source and follow the installation steps carefully. Typically‚ updates are transferred via a USB connection or wirelessly if supported. After updating‚ restart the thermostat to apply changes. If you encounter difficulties‚ consult the user manual or contact customer support for assistance. Regular updates ensure optimal performance and security. Always verify the source of the update to avoid unauthorized software. If no updates are needed‚ your thermostat will notify you. Keep your device updated for the best experience. Professional help is recommended if issues persist after an update.

Technical Specifications

The Lux TX9600TS features a 7-day programmable design‚ touchscreen interface‚ and compatibility with most HVAC systems. It requires standard power supplies for operation and connectivity.

7.1. Compatibility

The Lux TX9600TS is compatible with a wide range of heating‚ ventilation‚ and air conditioning (HVAC) systems‚ including conventional‚ heat pump‚ and dual-fuel configurations. It supports multi-stage systems for enhanced control and efficiency. Additionally‚ it is designed to work seamlessly with most standard wiring setups‚ ensuring compatibility with existing home systems. The thermostat is also compatible with both 24V and 12V systems‚ making it versatile for different installations. Its universal design allows it to integrate with various HVAC equipment‚ providing reliable performance across diverse setups. This broad compatibility ensures that the TX9600TS can be installed in numerous residential environments without major modifications.

7.2. Power Requirements

The Lux TX9600TS requires a 24V AC power supply‚ ensuring reliable operation in most residential HVAC systems. It is compatible with both 24V and 12V systems‚ accommodating various installation needs. The thermostat does not require a battery‚ as it draws power directly from the HVAC system. A common (C) wire is necessary for proper functionality‚ enabling features like the touchscreen display and advanced programming. Maximum current draw is minimal‚ typically under 1mA‚ making it energy-efficient. Voltage requirements range between 18V AC and 30V AC‚ ensuring stability across different power conditions. Always verify system compatibility and wiring before installation to avoid potential issues. Refer to the manual for detailed specifications and installation guidelines.

The Lux TX9600TS touchscreen programmable thermostat is a versatile and energy-efficient solution for modern homes. With its 7-day programmability‚ intuitive touchscreen‚ and advanced features‚ it offers precise temperature control and convenience. The thermostat’s compatibility with various HVAC systems and its low power requirements make it a reliable choice. By following the installation and operating instructions‚ users can optimize their heating and cooling systems while reducing energy consumption. Regular maintenance‚ such as cleaning and software updates‚ ensures long-term performance. The Lux TX9600TS is an excellent investment for homeowners seeking a balance of functionality‚ efficiency‚ and ease of use. Refer to the manual for detailed guidance and troubleshooting tips to maximize its benefits.

rai manual 2023

The RAI Manual 2023 is a comprehensive guide for assessing resident needs in long-term care facilities, updated with new coding items and a focus on health equity.

Overview of the Resident Assessment Instrument (RAI)

The Resident Assessment Instrument (RAI) is a standardized tool used in long-term care facilities to evaluate residents’ physical, mental, and functional needs. It helps staff identify individual strengths and care requirements, ensuring personalized support. The RAI process includes comprehensive assessments, such as the Minimum Data Set (MDS), to collect accurate resident data. This information is critical for care planning, reimbursement, and quality improvement initiatives. The RAI Manual 2023 introduces updated coding items, revised definitions, and an expanded focus on health equity, reflecting CMS’s commitment to enhancing care quality and accessibility. Effective October 1, 2023, these updates aim to improve assessment accuracy and resident outcomes. Training resources are available to support staff in implementing these changes effectively.

Importance of the RAI Manual in Long-Term Care Facilities

The RAI Manual 2023 is essential for long-term care facilities as it provides standardized methods to assess residents’ needs, ensuring accurate care planning and compliance with regulations. It guides staff in gathering critical data for reimbursement and quality improvement initiatives. By aligning with CMS updates, the manual enhances care delivery, focusing on resident strengths and health equity. Facilities rely on the RAI Manual to meet compliance requirements and improve resident outcomes. Training resources, such as CMS-released videos and slides, support staff in mastering the updated assessment processes. This ensures consistent, high-quality care tailored to individual needs, fostering a more equitable and effective care environment.

Key Updates and Changes in the RAI Manual 2023

The 2023 RAI Manual introduces new coding items, revised definitions, and an expanded focus on resident strengths and needs, aligning with health equity initiatives and CMS updates.

New Coding Items and Revised Definitions

The RAI Manual 2023 includes new coding items and revised definitions to enhance accuracy in resident assessments. These updates reflect changes in care practices and regulatory requirements, ensuring that assessments align with current standards. New codes address emerging health conditions and functional needs, while revised definitions provide clarity for consistent data collection. These modifications support more precise identification of resident strengths and needs, aiding in personalized care planning. The updates also incorporate feedback from healthcare providers, ensuring practicality and relevance in clinical settings. By refining coding items and definitions, the manual improves the overall quality and reliability of resident assessments in long-term care facilities.

Expanded Focus on Resident Strengths and Needs

The RAI Manual 2023 places a stronger emphasis on identifying resident strengths and needs, enabling more holistic care planning. This updated approach ensures that assessments capture not only deficits but also residents’ abilities and preferences. By focusing on individual strengths, caregivers can develop personalized plans that promote independence and quality of life. The manual includes revised sections that highlight functional capabilities and psychosocial well-being, providing a more balanced view of each resident. This shift supports person-centered care and aligns with health equity initiatives, ensuring that all residents receive tailored support based on their unique circumstances and goals.

Alignment with Health Equity Initiatives

The RAI Manual 2023 aligns with broader health equity initiatives, emphasizing fair and equitable care for all residents. Updates include new coding items that address disparities and promote culturally competent care. The manual now incorporates measures to identify and mitigate inequities, ensuring that care plans reflect the diverse needs of residents from all backgrounds. This focus on equity supports underserved populations and ensures that care is inclusive and respectful of individual differences. By integrating health equity principles, the RAI Manual 2023 helps facilities deliver high-quality, person-centered care that addresses systemic disparities and improves outcomes for all residents.

Structure and Organization of the RAI Manual 2023

The RAI Manual 2023 is structured into clear sections and chapters, ensuring a logical flow of information. It includes comprehensive guidelines, updated coding items, and detailed appendices for quick reference.

Sections and Chapters Overview

The RAI Manual 2023 is divided into well-organized sections and chapters, each addressing specific aspects of resident assessment. It begins with an introduction to the RAI process, followed by detailed chapters on assessment procedures, coding guidelines, and documentation requirements. Additionally, the manual includes sections dedicated to new coding items, revised definitions, and expanded focus areas such as resident strengths and needs. The structure ensures that users can easily navigate through the content, accessing relevant information efficiently. This clear organization supports effective implementation of the RAI Manual in long-term care facilities, promoting accurate and comprehensive resident assessments.

Navigation Tips for Effective Use

To effectively use the RAI Manual 2023, start by reviewing the updated table of contents and change tables to identify new or revised sections. Utilize the cross-referenced indices and hyperlinked sections for easy navigation. Pay attention to highlighted changes and summaries at the beginning of each chapter. Training videos and slides released by CMS can also provide clarity on key updates. Regularly check the official CMS website for the latest resources and updates. Familiarize yourself with new coding items and revised definitions to ensure accurate assessments. Lastly, use the manual in conjunction with facility-specific training to maximize its effectiveness in daily operations. This structured approach ensures seamless implementation of the RAI Manual 2023.

Training and Resources for RAI Manual 2023

CMS offers training videos, slides, and updated manuals to support effective use of the RAI Manual 2023, ensuring staff are well-prepared for implementation and compliance.

CMS-Released Training Videos and Slides

CMS has released comprehensive training materials, including videos and slides, to guide users through the updates in the RAI Manual 2023. These resources are designed to help staff understand new coding items, revised definitions, and expanded focus areas such as resident strengths and needs. The training materials also address alignment with health equity initiatives, ensuring a person-centered approach in care assessments. Additionally, CMS has provided detailed presentations that outline the structure and organization of the manual, offering navigation tips for effective use. These resources are accessible online and are recommended for all healthcare professionals involved in resident assessments to ensure compliance with the updated guidelines.

Best Practices for Staff Training

Effective staff training on the RAI Manual 2023 requires a structured approach to ensure accurate implementation. Facilities should prioritize interactive training sessions, incorporating real-life examples and hands-on exercises to enhance understanding. Providing access to CMS-released training materials, such as videos and slides, is essential for consistency. Staff should be encouraged to review updated coding items, revised definitions, and expanded focus areas, such as resident strengths and needs. Regular follow-up sessions and competency assessments can reinforce learning and address challenges. Additionally, fostering a collaborative environment where staff can share insights and experiences promotes a comprehensive understanding of the manual. Continuous updates and feedback mechanisms ensure ongoing compliance with RAI Manual 2023 guidelines.

Implementation and Compliance

The RAI Manual 2023 implementation begins October 1, 2023, requiring strict adherence to updated coding and assessment protocols. CMS provides training materials and transition guidelines to ensure compliance.

Effective Dates and Transition Guidelines

The RAI Manual 2023 updates take effect on October 1, 2023, with a transition period for facilities to adapt to new coding items and assessment protocols. CMS has released a change document highlighting modifications from the draft version (April 1, 2023) to the final version (August 22, 2023). This document outlines substantive and non-substantive changes, ensuring a smooth transition for users. Facilities are encouraged to review the updated manual and associated resources, such as replacement pages and MDS forms, to ensure compliance. Training materials and videos are available to support staff in understanding and implementing the changes effectively.

Compliance Requirements for Nursing Homes

Nursing homes must adhere to the updated RAI Manual 2023 guidelines to ensure accurate resident assessments and maintain compliance with CMS regulations. Facilities are required to implement the new coding items and revised definitions starting October 1, 2023. Staff must complete training on the updated manual to understand changes in assessment protocols and documentation standards. Compliance audits will focus on the accuracy of MDS submissions and alignment with health equity initiatives. Failure to comply may result in penalties, emphasizing the importance of thorough training and adherence to the updated manual’s directives.

Troubleshooting and FAQs

This section addresses common challenges and frequently asked questions about the RAI Manual 2023, providing solutions and clarity on updated assessment procedures and compliance requirements.

Common Challenges and Solutions

Implementing the RAI Manual 2023 often presents challenges, such as understanding new coding items or navigating revised definitions. Staff may struggle with interpreting expanded focus areas like resident strengths and needs. Solutions include leveraging CMS training materials, such as videos and slides, to clarify updates. Facilities should also conduct regular training sessions to ensure staff proficiency. Additionally, cross-referencing the manual with health equity initiatives can help address gaps in care assessment. For technical issues, referring to the troubleshooting guide or FAQs is recommended. Open communication among teams and consistent updates can mitigate common hurdles, ensuring compliance and effective resident care.

  • Challenge: Understanding new coding items.
  • Solution: Utilize CMS training resources.
  • Challenge: Navigating revised definitions.
  • Solution: Refer to updated manuals and guides.

Frequently Asked Questions

Frequently asked questions about the RAI Manual 2023 include inquiries about effective dates, new coding items, and compliance requirements. Many users ask about the expanded focus on resident strengths and needs, seeking clarity on how these changes impact assessments. Others inquire about training resources, such as CMS-released videos and slides, to aid in implementation. Questions also arise regarding alignment with health equity initiatives and how to navigate the updated manual structure. Additionally, users often seek guidance on troubleshooting common challenges and understanding the transition guidelines for compliance. These FAQs highlight the need for clear communication and accessible resources to support effective use of the manual.

magic cube manual

The Magic Cube, also known as the Rubik’s Cube, is a iconic puzzle toy invented by Ernő Rubik in 1974․ It consists of 26 smaller cubes, or “cubelets,” that rotate on axes, creating a 3D challenge․ The goal is to align all colored faces, enhancing problem-solving skills, patience, and hand-eye coordination․ This cube has become a cultural phenomenon, inspiring countless solvers and competitions worldwide․ Its simplicity and complexity make it a timeless brain teaser for all ages․

1․1 What is a Magic Cube?

A Magic Cube, commonly known as a Rubik’s Cube, is a 3D puzzle consisting of 26 smaller cubes or “cubelets” that rotate on axes․ The goal is to align all colored faces, enhancing problem-solving skills, patience, and hand-eye coordination․ Invented by Ernő Rubik in 1974, it became a global phenomenon, challenging users to solve its intricate structure․ The cube’s educational benefits include fostering spatial awareness and logical thinking․ Its compact design and addictive nature make it a timeless puzzle, appealing to all ages and skill levels․ Solving it requires understanding its mechanics and applying strategic algorithms․ The Magic Cube has inspired competitions, speedcubing, and a dedicated community, solidifying its place as one of the most iconic brain teasers in history․

1․2 History of the Magic Cube

The Magic Cube, widely recognized as the Rubik’s Cube, was invented in 1974 by Hungarian sculptor and professor of architecture Ernő Rubik․ Initially created as a tool to help his students understand three-dimensional geometry, it quickly gained global popularity․ The cube’s unique design, featuring 26 smaller cubes that rotate on axes, captivated millions․ By the 1980s, it became a cultural phenomenon, symbolizing intellectual challenge and creativity․ The first Patent for the “Magic Cube” was granted in 1975 in Hungary and later internationally in 1977․ Over the years, the cube has evolved, inspiring various sizes and solving techniques․ Its enduring appeal has made it one of the most recognizable puzzles in history, fostering a community of solvers and competitors․ The Magic Cube’s legacy continues to inspire new generations, proving its timeless allure․

1․3 Educational Benefits of Solving a Magic Cube

Solving a Magic Cube offers numerous educational benefits, enhancing cognitive, motor, and emotional skills․ It improves spatial awareness, critical thinking, and problem-solving abilities by requiring the manipulation of 3D structures․ The cube fosters patience, perseverance, and hand-eye coordination, as each move demands precision and focus․ It also boosts memory, as solvers learn and recall algorithms to align colors․ For students, it can enhance math understanding, introducing concepts like patterns, geometry, and symmetry․ Additionally, solving the cube builds confidence and self-esteem, providing a sense of accomplishment with each step mastered․ It encourages logical reasoning and creativity, essential for tackling real-world challenges․ The Magic Cube serves as a versatile learning tool, bridging fun and education seamlessly․ Its ability to engage diverse skill levels makes it a valuable asset for both children and adults seeking mental stimulation and growth․

The Basics of Solving a Magic Cube

Mastering the Magic Cube begins with understanding its structure and movement․ Start by solving the first layer, then the second, and finally the third․ Learn basic algorithms and practice consistently to build confidence and skill in aligning colors and completing the puzzle․

2․1 Understanding the Cube Structure

The Magic Cube, also known as the Rubik’s Cube, is a 3D puzzle composed of 26 smaller cubes called “cubelets․” These cubelets are divided into three types: corner, edge, and center pieces․ Corner pieces have three visible faces, edge pieces have two, and center pieces have one․ The cube is held together by a central axis system, allowing each layer to rotate independently․ The standard cube has six faces, each covered with nine stickers of the same color․ Solving the cube involves aligning all the stickers on each face to form a uniform color․ Understanding this structure is crucial for developing effective solving strategies and mastering the cube․

2․2 Essential Terminology and Notations

Mastering the Magic Cube requires understanding key terms and notations․ The cube consists of six faces: Front (F), Back (B), Right (R), Left (L), Up (U), and Down (D)․ Moves are denoted by these letters, with modifiers indicating direction: an apostrophe (‘) for counterclockwise, ‘i’ for inverse, and ‘2’ for 180-degree turns․ Corner pieces have three colors, edge pieces have two, and center pieces have one․ The cube is divided into layers, with the white cross being a common starting point․ Terms like scrambled (mixed) and solved state (aligned) describe the cube’s condition․ Understanding these terms and notations is vital for following algorithms and solving strategies․

2․3 Step-by-Step Guide to Solving the First Layer

Solving the first layer is the foundation of mastering the Magic Cube․ Begin by holding the cube in front of you with the white face on top․ The goal is to create a white cross by aligning the white edge pieces with the white center․ Start by finding a white edge piece and twist the top layer until it aligns with the white center․ Once the cross is formed, focus on solving the corners․ Twist the bottom layer to bring a corner piece to its correct position․ Use the “U’ D'” move to cycle the corner into place without disturbing the cross․ Repeat this process for each corner, ensuring they match the center colors․ Finally, orient the edges by twisting the top layer to align any remaining edge pieces․ This step-by-step approach ensures a solid base for solving the cube․

Advanced Solving Techniques

Mastering advanced techniques enhances solving efficiency and speed․ Learn algorithms for orienting and permuting the third layer, and discover common methods for faster, more precise cube solving, improving overall mastery․

3․1 Solving the Second Layer

Solving the second layer involves aligning the middle slice while maintaining the first layer’s integrity․ Start by ensuring the white cross on the top layer is complete․ Next, focus on matching the edge pieces of the second layer with their corresponding center colors․ Use algorithms like the “T” and “Y” moves to maneuver pieces into place without disturbing the first layer․ Pay attention to the orientation of the edge pieces to ensure they align correctly․ Once the edges are matched, use the “F” move to flip the cube and solve the second layer’s corners․ Practice these steps to build muscle memory and improve efficiency․ This layer is crucial for setting up the final layer, so precision is key․ With consistent practice, solving the second layer becomes second nature, paving the way for mastering the entire cube․

3․2 Orienting and Permuting the Third Layer

Orienting the third layer involves ensuring all remaining stickers on the top face match their respective centers․ Start by holding the cube with the solved second layer at the bottom․ Use the “R” and “L” moves to orient the top layer’s edges and corners․ Once oriented, focus on permuting the pieces to their correct positions․ Use the “E” move to cycle edge pieces and the “F” move to adjust corner positions․ If edges or corners are swapped, employ specific algorithms like “T” or “Y” to resolve mismatches․ Avoid disturbing the first two layers while executing these moves․ Permutation parity issues can arise, requiring additional algorithms to correct․ Practice these techniques to efficiently orient and permute the final layer, ensuring a smooth path to solving the cube․ Mastery of this step is essential for achieving a fully solved Magic Cube․

3․3 Common Algorithms for Faster Solving

Mastering essential algorithms is crucial for solving the Magic Cube efficiently․ The “F2L” (First Two Layers) method combines edge and corner pairing, reducing piece mismatches․ The “OLL” (Orientation of the Last Layer) and “PLL” (Permutation of the Last Layer) algorithms are vital for orienting and permuting the final layer․ Use the “S” algorithm to swap edges without disturbing the rest of the cube, while the “T” algorithm helps correct corner orientations; For advanced solvers, the “Y” and “Z” algorithms streamline edge and corner alignment․ Practicing these sequences improves speed and accuracy․ Additionally, learning “Fridrich” methods, such as “Cross” and “F2L,” enhances overall efficiency․ Regular practice of these algorithms reduces solve times and refines technique, making them indispensable for both casual and competitive cubers aiming to master the Magic Cube․

Speedcubing and Competitions

Speedcubing is a competitive sport where solvers aim to break records․ The current Guinness World Record is 0․305 seconds by TOKUFASTbot․ Competitions foster innovation and community growth, thrilling cubing enthusiasts worldwide․

Speedcubing is the competitive practice of solving a Rubik’s Cube as quickly as possible․ It has evolved into a global sport, with enthusiasts competing in events sanctioned by organizations like the World Cube Association (WCA)․ The goal is to achieve the fastest solve times, often using optimized algorithms and advanced techniques․ Speedcubers train extensively to master finger tricks, cube orientation, and efficient problem-solving strategies․ The rise of speedcubing has led to remarkable records, such as the current Guinness World Record of 0․305 seconds by TOKUFASTbot, showcasing human and machine capabilities․ This competitive environment fosters innovation, camaraderie, and continuous improvement among cubers worldwide․

4․2 Advanced Speedcubing Techniques

Advanced speedcubing techniques involve refined strategies to minimize solving time․ These include “Two-Look” and “One-Look” systems to reduce algorithm usage by predicting cube orientation․ “Finger independence” enhances dexterity, enabling faster moves․ “Muscle memory” of algorithms like Y and Z permutations streamlines execution․ Efficient edge and corner alignment during solves is crucial․ Practitioners use “timing sessions” to optimize speed and “review solves” to refine methods․ These techniques require extensive practice and mastery of cube mechanics․ They allow solvers to achieve sub-10 second times, pushing the limits of human speedcubing potential․

4․3 World Records in Magic Cube Solving

World records in Magic Cube solving highlight the extraordinary speed and skill of top cubers․ As of recent updates, the fastest solve by a human is held by Max Park, with a time of 3․13 seconds in the 3x3x3 category․ In robotic solving, TOKUFASTbot achieved a record of 0․305 seconds, demonstrating incredible mechanical efficiency․ These records showcase the evolution of speedcubing techniques and innovation․ Competitions sanctioned by the World Cube Association (WCA) maintain official records, ensuring fair and standardized judging․ Speedcubers like Feliks Zemdegs and Tymon Kolasinski have also made significant contributions to pushing these records․ The pursuit of faster times continues to inspire innovation in both human and robotic solving methods, making the Magic Cube a timeless challenge for enthusiasts worldwide․

Mastering the Magic Cube is a journey of skill and patience․ It enhances problem-solving abilities and hand-eye coordination․ With persistence, anyone can unlock its secrets and enjoy the satisfaction of solving this iconic puzzle․

5․1 Final Tips for Mastering the Magic Cube

To master the Magic Cube, start by understanding its structure and terminology․ Practice regularly, focusing on one layer at a time, and use algorithms to streamline the process․ Begin with the white cross on the top layer, then proceed to the middle and final layers․ Stay patient and persistent, as repetition builds skill․ Learn essential algorithms for faster solving, such as the “F2L” and “OLL” methods․ Watching tutorials and joining cubing communities can also enhance your learning․ Most importantly, embrace the challenge and enjoy the journey of unlocking the cube’s secrets․ With dedication, you’ll not only solve the cube but also improve cognitive skills like problem-solving and hand-eye coordination․

ruffwear harness size guide

Welcome to the Ruffwear Harness Size Guide‚ your go-to resource for ensuring a perfect fit for your dog․ Proper sizing is key to comfort‚ support‚ and safety․ Measure your dog’s girth accurately to choose the ideal harness size from Ruffwear’s collection‚ designed for adventure and everyday use․ This guide will help you navigate the sizing process with ease‚ ensuring your dog enjoys maximum comfort and mobility․

How to Measure Your Dog for a Ruffwear Harness

Locate the widest part of your dog’s rib cage‚ just behind the front legs․ Use a flexible tape measure to circle the chest at this point․ Ensure the dog stands upright and relaxed for an accurate reading․ The tape should be snug but not tight‚ allowing enough space to fit your hand comfortably underneath․ Measure consistently each time to ensure reliability․ This precise girth measurement is essential for selecting the correct harness size from Ruffwear’s range‚ ensuring optimal comfort and support during adventures․

Step-by-Step Measurement Guide

Gather a flexible tape measure and ensure your dog is standing upright in a relaxed position․

Identify the widest point of the rib cage‚ located just behind your dog’s front legs․

Wrap the tape measure around this area‚ ensuring it’s snug but not constricting․

Record the measurement in inches or centimeters‚ keeping the dog calm and still for accuracy․

Compare the recorded girth to Ruffwear’s size charts to determine the best fit․

This method ensures precise sizing‚ avoiding both tight and loose harnesses․ Regular measuring is advised‚ especially for growing puppies․ Always prioritize comfort and proper fit for optimal performance and your dog’s well-being․ By following these steps‚ you’ll achieve an accurate measurement‚ ensuring your dog’s harness provides the necessary support and comfort during adventures․ This guide is essential for selecting the right Ruffwear harness‚ tailored to your dog’s unique size and needs․

Ruffwear Harness Size Chart

Ruffwear offers a detailed size chart‚ categorizing harness sizes from XXS to L/XL․ Measurements range from 13-17 inches (XXS) to 32-42 inches (L/XL)‚ ensuring a tailored fit for all dog breeds․ This chart is designed to help you select the perfect size based on your dog’s girth‚ ensuring maximum comfort and support during adventures․ Always refer to this chart for accurate sizing‚ as proper fit is crucial for your dog’s comfort and safety․ By using this chart‚ you can confidently choose the ideal harness size for your furry companion‚ whether they’re a small puppy or a large adult dog․ This guide is essential for every dog owner looking to equip their pet with a Ruffwear harness‚ providing a comprehensive and easy-to-follow sizing solution․

Size Chart for Ruffwear Front Range Harness

The Ruffwear Front Range Harness is available in five sizes: XXS‚ XS‚ S‚ M‚ and L/XL․ The size chart is based on your dog’s girth‚ measured around the widest part of their chest․ For XXS‚ the girth ranges from 13-17 inches (33-43 cm)‚ while XS fits dogs with a girth of 17-22 inches (43-56 cm)․ The small size accommodates 22-27 inches (56-69 cm)‚ medium fits 27-32 inches (69-81 cm)‚ and the large/extra-large size covers 32-42 inches (81-107 cm)․ This range ensures a comfortable and secure fit for dogs of various breeds and sizes․ Always measure your dog accurately and refer to this chart to ensure the best fit for your Front Range Harness․ Proper sizing ensures your dog can move freely and enjoy all-day comfort during hikes‚ walks‚ or playtime․ This chart is a valuable tool for pet owners seeking a reliable and durable harness for their furry companions․ By following the size guidelines‚ you can provide your dog with a harness that offers both support and flexibility‚ making every adventure more enjoyable․ The Ruffwear Front Range Harness is designed for performance‚ and the correct size ensures optimal functionality and comfort for your dog․

Size Chart for Ruffwear Web Master Harness

The Ruffwear Web Master Harness offers six sizes to fit a wide range of dog breeds and sizes․ The sizes include XXS‚ XS‚ S‚ M‚ L‚ and XL․ The girth measurements for each size are as follows: XXS fits dogs with a girth of 13-17 inches (33-43 cm)‚ XS accommodates 17-22 inches (43-56 cm)‚ S fits 22-27 inches (56-69 cm)‚ M suits 27-32 inches (69-81 cm)‚ L is designed for 32-36 inches (81-91 cm)‚ and XL fits dogs with a girth of 36-40 inches (91-102 cm)․ This harness is ideal for dogs that require additional support‚ making it perfect for hiking‚ working‚ or service dogs․ The Web Master Harness is known for its durability and adjustable fit‚ ensuring your dog stays comfortable and secure in various environments․ By using this size chart‚ you can ensure the harness is neither too tight nor too loose‚ providing the perfect balance of support and mobility․ Proper sizing is crucial for your dog’s comfort and performance‚ making this chart an essential tool for any dog owner․ The Ruffwear Web Master Harness is a popular choice among active dog owners due to its reliability and versatility‚ and selecting the right size ensures your dog can enjoy all the benefits it has to offer․ This size chart is a helpful guide to finding the ideal fit for your furry companion‚ ensuring they can participate in all activities with ease and comfort․ The Web Master Harness is designed to last‚ and with the correct size‚ it will be a trusted companion for many adventures to come․

Size Chart for Ruffwear Hi & Light Harness

The Ruffwear Hi & Light Harness is designed for dogs that need a lightweight yet durable harness for everyday adventures․ It is available in six sizes: XXS‚ XS‚ S‚ M‚ L‚ and XL․ The girth measurements for each size are as follows: XXS fits dogs with a girth of 13-17 inches (33-43 cm)‚ XS accommodates 17-22 inches (43-56 cm)‚ S fits 22-27 inches (56-69 cm)‚ M suits 27-32 inches (69-81 cm)‚ L is designed for 32-36 inches (81-91 cm)‚ and XL fits dogs with a girth of 36-40 inches (91-102 cm)․ This harness is perfect for smaller breeds or dogs that prefer minimal bulk while still offering essential support and comfort․ Its lightweight design makes it ideal for high-energy activities without compromising on durability․ The Hi & Light Harness is a great choice for dogs that require a snug‚ adjustable fit for long walks‚ runs‚ or casual outings․ By referring to this size chart‚ you can ensure your dog gets the perfect fit‚ allowing them to move freely and comfortably․ This harness is also easy to put on and take off‚ featuring a simple yet secure design․ Whether your dog is a lively companion or a seasoned adventurer‚ the Hi & Light Harness in the right size will provide the comfort and support they need․ With its focus on lightweight construction and reliable performance‚ this harness is a favorite among dog owners who prioritize both style and functionality․ Make sure to measure your dog accurately to select the correct size and enjoy the benefits of this versatile harness․ The Hi & Light Harness is a testament to Ruffwear’s commitment to creating high-quality‚ dog-friendly products that enhance your pet’s lifestyle․ By choosing the right size‚ you can ensure your dog’s comfort and happiness on every adventure․

Understanding Girth Measurement

Girth measurement is crucial for selecting the right Ruffwear harness․ It measures the widest part of your dog’s chest‚ ensuring a comfortable and secure fit for any adventure․

Why Girth is the Most Important Measurement

Girth is the most critical measurement for Ruffwear harnesses as it ensures a snug‚ comfortable fit around your dog’s chest․ A proper girth measurement prevents the harness from being too tight or too loose․ It allows for optimal distribution of force‚ reducing discomfort during activities․ Ruffwear harnesses are designed to fit based on girth‚ with sizes ranging from XXS to L/XL․ Accurate girth measurement ensures the harness stays in place‚ providing support and freedom of movement․ Neglecting girth can lead to an ill-fitting harness‚ causing discomfort or restricted mobility․ Always measure your dog’s girth at the widest point of their rib cage for the best fit․

Choosing the Right Size for Your Dog

Selecting the correct size ensures your dog’s comfort‚ safety‚ and mobility․ Use Ruffwear’s size chart and your dog’s girth measurement to find the perfect fit for their harness․ Proper sizing ensures optimal performance during adventures‚ preventing discomfort or restricted movement․ Always refer to the size guide to make the best choice for your dog’s specific needs and ensure a secure‚ comfortable fit for every outing․ This step is crucial for harness functionality and your dog’s overall well-being during various activities and environments․

How to Interpret the Size Chart

Interpreting the Ruffwear size chart is straightforward once you have your dog’s girth measurement․ Locate the girth range that best fits your dog within the chart․ Each size corresponds to a specific measurement range‚ ensuring the harness isn’t too tight or too loose․ For example‚ if your dog’s girth is 27 inches‚ they fall into the Medium category․ Always choose the size that encompasses your dog’s measurement without exceeding the upper limit․ If your dog is between sizes‚ consider factors like breed‚ build‚ and growth potential to decide whether to size up or down․ Proper interpretation ensures the harness provides the necessary support and comfort for your dog’s adventures․ This step is crucial for optimizing the harness’s performance and your dog’s overall comfort during various activities․ By carefully matching your dog’s girth to the correct size range‚ you can ensure a secure and comfortable fit every time․ Ruffwear’s size chart is designed to make this process easy‚ offering clear guidelines to help you make the best choice for your dog․ Always double-check your measurements against the chart to avoid any sizing errors․ This attention to detail will ensure your dog enjoys the full benefits of their Ruffwear harness‚ whether on a hike or a casual stroll․ The size chart is your key to unlocking the perfect fit‚ so use it wisely to enhance your dog’s outdoor experiences․ By following these steps‚ you can confidently select the right size and ensure your dog’s harness is both comfortable and functional․ This guide is here to help you every step of the way‚ ensuring your dog is always adventure-ready with a well-fitting harness․

Factors to Consider for the Perfect Fit

When selecting the right Ruffwear harness size‚ several factors should be considered to ensure optimal comfort and functionality․ Your dog’s breed‚ body type‚ and weight play a significant role‚ as different breeds may have varying chest structures․ For example‚ a deeper-chested breed like a Bulldog may require a slightly larger size compared to a slender breed like a Whippet․ Additionally‚ consider your dog’s activity level‚ as high-energy dogs may need a more secure fit to prevent shifting during movement․ Seasonal changes‚ such as shedding or weight fluctuations‚ can also impact the fit․ If your dog is still growing‚ account for future size changes to avoid frequent resizing․ Personal preference for a snug or relaxed fit should also guide your decision․ By evaluating these factors‚ you can ensure the harness provides the perfect balance of support and comfort for your dog’s unique needs․ Proper fit is essential for your dog’s comfort and safety‚ making these considerations crucial for the best results․

Common Sizing Mistakes to Avoid

Common sizing mistakes include not measuring girth accurately‚ guessing sizes‚ and ignoring factors like activity level and growth‚ which can lead to an improper fit․

Mistakes That Can Lead to an Ill-Fitting Harness

One of the most frequent errors is failing to measure the dog’s girth accurately․ Many pet owners either underestimate or overestimate their dog’s size‚ resulting in a harness that is either too tight or too loose․ Another common mistake is not considering the dog’s growth‚ especially for puppies․ Ordering a harness based solely on the dog’s weight rather than girth can also lead to an improper fit․ Additionally‚ some owners neglect to consult the size chart provided by Ruffwear‚ which is tailored to specific breeds and body types; These oversights can cause discomfort for the dog and may affect its mobility during activities․ Ensuring accurate measurements and referencing the correct size chart are crucial steps to avoid these issues and guarantee a comfortable‚ secure fit for your dog․ Always double-check your measurements before making a purchase to ensure the best outcome for your furry companion․

How to Ensure a Proper Fit

Measure your dog’s girth at the widest point of their chest and adjust the harness straps for a snug‚ comfortable fit that allows full mobility and support․

Adjusting the Harness for Maximum Comfort

Once you’ve selected the correct size based on your dog’s girth‚ adjusting the harness is crucial for maximum comfort․ Start by placing the harness on your dog‚ ensuring it sits snugly around their chest; Tighten the straps gradually‚ making sure not to restrict movement or breathing․ Check the fit by sliding your fingers under the harness—if it’s too tight‚ loosen the straps slightly․ Pay special attention to the shoulder and chest areas‚ as these are key points for comfort and support․ Adjust the harness so it allows a full range of motion while maintaining a secure fit․ Regularly check and readjust the harness as your dog grows or sheds their winter coat to ensure ongoing comfort and proper support․

Ruffwear Harness Sizing Tips

Measure your dog’s girth at the widest point of their chest․ Choose the size that matches this measurement․ Adjust the harness straps for a snug‚ comfortable fit․ Ensure your dog has a full range of motion․ Regularly check the fit as your dog grows or sheds․ Consult Ruffwear’s size chart for guidance․ Proper sizing ensures comfort and safety during adventures․

Additional Tips for Accurate Sizing

For accurate sizing‚ ensure your dog stands naturally and relaxed when measuring their girth․ Avoid pulling the tape too tight or leaving it too loose․ If your dog’s girth falls between two sizes‚ consider their growth or activity level․ For puppies‚ account for future growth by choosing a slightly larger size․ Double-check your measurements with Ruffwear’s official size chart․ If unsure‚ consult customer reviews or reach out to Ruffwear support for guidance․ Proper fit ensures comfort‚ support‚ and optimal performance of the harness․ Regularly reassess the fit as your dog’s size or shape changes․ This attention to detail will provide your dog with the best possible harness experience․

the open window pdf

The Open Window PDF is readily available online‚ offering convenient access to Saki’s classic tale for students and literature enthusiasts‚ along with study materials.

1.1 Overview of the Story

The Open Window by Saki revolves around Framton Nuttel‚ a nervous visitor to Mrs. Sappleton’s countryside home. Vera‚ Mrs. Sappleton’s niece‚ deceives Framton by fabricating a tragic story about the open window‚ claiming it was left open for her deceased uncles. The tale unfolds with suspense‚ showcasing Vera’s mischievous nature and Framton’s gullibility‚ culminating in a dramatic and ironic conclusion. The PDF format enhances accessibility‚ offering insights into themes and literary devices for deeper analysis.

1.2 Importance of the PDF Format

The PDF format of The Open Window is crucial for easy access and readability. It allows students and readers to download the story along with study materials‚ summaries‚ and analysis. The format ensures that the text remains unchanged‚ preserving Saki’s original intent. Free PDF downloads are widely available‚ making the story accessible for educational purposes and personal reading. This convenience enhances the learning experience and fosters deeper engagement with the narrative.

Plot Summary of “The Open Window”

Framton Nuttel visits Mrs. Sappleton‚ where her niece Vera craftily deceives him about a tragic family history tied to an open window‚ leading to a chilling revelation.

2.1 Framton Nuttel’s Visit to Mrs. Sappleton

Framton Nuttel‚ a nervous visitor‚ arrives at Mrs. Sappleton’s countryside home seeking rest for his health. His sister arranged the visit‚ hoping it would aid his recovery. Upon arrival‚ he meets Vera‚ Mrs. Sappleton’s niece‚ who engages him in conversation while they await her aunt. The open window becomes a focal point‚ sparking curiosity and setting the stage for Vera’s deceptive tale that unfolds the story’s dark humor and unexpected twist.

2.2 Vera’s Role in the Story

Vera‚ Mrs. Sappleton’s niece‚ plays a pivotal role in the story by fabricating a chilling tale about the open window. Her mischievous narrative deceives Framton Nuttel‚ creating a sense of mystery and suspense. Vera’s clever manipulation of the situation highlights her cunning nature‚ making her a central figure in the story’s dark humor and unexpected twist. Her actions drive the plot forward‚ revealing her as a master of deception.

2.3 The Mysterious Open Window

The open window serves as a central element of mystery and suspense in the story. Vera cleverly weaves a haunting tale around it‚ claiming it is kept open for her uncle’s return. The window’s eerie presence‚ left open even in cold weather‚ creates an unsettling atmosphere. Its significance is revealed when Framton Nuttel‚ terrified by the illusion Vera creates‚ flees upon seeing figures he believes are the ghosts of her uncles.

Characters in “The Open Window”

Framton Nuttel‚ a nervous visitor‚ Vera‚ the cunning niece‚ and Mrs. Sappleton‚ the enigmatic host‚ drive the story’s tension and humor through their interactions and deception.

3;1 Framton Nuttel: The Nervous Visitor

Framton Nuttel‚ a man with a nervous condition‚ visits Mrs. Sappleton seeking rest and recovery. His awkward attempts to engage in conversation reveal his anxiety and impressionability. Vera’s eerie tale deeply unsettles him‚ leading to his hasty departure‚ showcasing his fragile mental state and gullibility. His character highlights the psychological impact of suggestion and deception‚ making him a pivotal figure in the story’s darkly humorous twist.

3.2 Vera: The Mischievous Niece

Vera‚ Mrs. Sappleton’s cunning niece‚ plays a pivotal role in the story with her deceptive tale. Her fabricated ghost story about the open window manipulates Framton Nuttel’s fragile psyche‚ leading to his terrified departure. Vera’s mischievous nature and clever storytelling showcase her ability to toy with reality‚ making her a central figure in the story’s darkly humorous and suspenseful unraveling.

3.3 Mrs. Sappleton: The Enigmatic Host

Mrs. Sappleton is portrayed as a mysterious figure with an air of tragedy surrounding her. Her fixation on the open window‚ kept open despite the cold‚ hints at a deeper sorrow tied to her past. Her demeanor is calm yet enigmatic‚ as she awaits the return of her husband and sons‚ creating an atmosphere of anticipation and subtle melancholy that underscores the story’s eerie undertones.

Themes in “The Open Window”

The story explores themes of horror‚ suspense‚ and irony‚ using Vera’s eerie tale to build tension‚ culminating in a shocking‚ ironic twist that leaves readers stunned.

4;1 The Theme of Horror and Suspense

Vera’s chilling tale about the open window masterfully crafts horror and suspense‚ manipulating Framton Nuttel’s fragile nerves. The eerie setting of the old house‚ combined with the mysterious window‚ builds tension. Vera’s description of the tragic events creates dread‚ while the window’s persistent openness symbolizes unresolved tragedy. The story’s twist‚ revealing the window’s dark history‚ leaves readers with a lingering sense of unease‚ blending horror with irony.

4.2 The Irony of the Open Window

The open window symbolizes tragic irony‚ as it serves as both an exit for the deceased family and Framton’s escape from fear. Vera’s deceptive tale manipulates Framton’s fragile psyche‚ leading to his terrified departure. The window‚ meant to honor past tragedy‚ ironically becomes the catalyst for a new‚ absurd exit‚ highlighting Saki’s mastery of situational irony and dark humor in “The Open Window.”

Literary Devices in “The Open Window”

The story employs symbolism‚ satire‚ and descriptive language to explore themes of deception and irony‚ with the open window serving effectively as a central symbolic element.

5.1 Symbolism of the Open Window

The open window in Saki’s tale symbolizes tragedy‚ deception‚ and the unseen. It represents the Sappleton family’s past sorrow and Vera’s clever manipulation. The window‚ left open to honor a tragic event‚ becomes a tool for Vera’s haunting illusion‚ blurring reality and fiction. This symbolic element drives the story’s horror and irony‚ highlighting themes of grief‚ deception‚ and the power of storytelling.

5.2 Satire and Social Commentary

Saki’s “The Open Window” subtly critiques societal norms through satire. Vera’s clever manipulation of Framton highlights the absurdity of societal expectations and the gullibility of individuals. The story mocks the superstitions and rigid social hierarchies of Edwardian England‚ using irony and humor to expose human frailty. Saki’s wit and sharp observation reflect his signature style‚ offering a timeless commentary on human behavior and class dynamics.

Availability of “The Open Window” in PDF Format

The Open Window PDF is widely available for free download on educational platforms and websites‚ offering easy access for students and enthusiasts of Saki’s works.

6.1 Free Download Options

The Open Window PDF is available for free download on various platforms like Docsity and educational websites‚ offering easy access to Saki’s classic tale. Students and enthusiasts can find the story in public domain resources‚ ensuring cost-free access without registration. This convenience makes it ideal for academic purposes and personal reading‚ providing a seamless way to explore the story’s themes and literary elements in a digital format.

6.2 Academic and Educational Resources

Educational platforms offer PDFs of “The Open Window” with summaries‚ question answers‚ and analysis‚ aiding students in understanding the story. These resources include notebooks and discussion questions‚ making them ideal for academic use. They provide in-depth insights into themes‚ characters‚ and literary devices‚ supporting teachers and students in classroom discussions and assignments. These materials are invaluable for fostering a deeper comprehension of Saki’s work in an educational setting.

Study Materials and Question Answers

PDF resources include summaries‚ question answers‚ and analysis‚ aiding students in understanding the story. Notebook entries and discussion questions encourage deeper engagement with Saki’s work.

7.1 Summary and Analysis for Students

PDF versions of “The Open Window” provide students with easy access to summaries and analyses. The story revolves around Framton Nuttel’s visit to Mrs. Sappleton‚ where Vera’s deception unfolds. The open window symbolizes tragedy and deception‚ highlighting Vera’s manipulation. Analysis sections in PDFs help students grasp themes like horror‚ irony‚ and the impact of Vera’s storytelling. These resources are essential for understanding Saki’s mastery of suspense and character dynamics.

7.2 Notebook Entries and Discussion Questions

PDF versions of “The Open Window” often include notebook entries and discussion questions to engage students. These resources help analyze Vera’s role‚ the significance of the open window‚ and the story’s impact. Questions prompt critical thinking about themes‚ character motivations‚ and literary devices like symbolism and irony. Notebook entries provide space for personal reflections‚ fostering a deeper understanding of Saki’s narrative techniques and the story’s enduring relevance.

The Significance of the Open Window

The open window symbolizes both tragedy and deception‚ serving as a focal point for the story’s dark humor and Vera’s manipulation of Framton Nuttel.

8.1 The Window as a Symbol of Tragedy

The open window in Saki’s tale symbolizes the lingering tragedy of the Sappleton family‚ whose sons drowned years ago. Vera manipulates Framton Nuttel by weaving a ghostly narrative around it‚ tying the window to their tragic past. Its persistent openness reflects the family’s unresolved grief and Vera’s cunning deception‚ blending tragedy with dark humor in a masterful storytelling twist.

8.2 The Window as a Tool for Deception

Vera cleverly uses the open window to deceive Framton Nuttel‚ crafting a haunting tale of ghostly brothers returning through it. She manipulates the window’s significance‚ presenting it as a portal for the deceased‚ while knowing it is merely a tool for her mischievous story. This deception highlights Vera’s cunning and the window’s role in amplifying the story’s eerie atmosphere‚ ultimately leading to Framton’s terrified departure.

Author Biography: Saki (H.H. Munro)

Hector Hugh Munro‚ known as Saki‚ was a British writer born in 1870 in Burma. His witty‚ satirical stories often critiqued Edwardian society‚ leaving a lasting legacy.

9.1 Life and Works of Saki

Hector Hugh Munro‚ known by his pen name Saki‚ was a British author born in 1870 in Akyab‚ Burma. He gained fame for his biting satire and short stories critiquing Edwardian society. His works‚ like The Open Window‚ blend humor with dark twists. Saki served in the Burmese police and later as a journalist before dedicating himself to writing. His legacy endures as a master of wit and social commentary.

9.2 His Contribution to English Literature

Saki’s works‚ including The Open Window‚ are celebrated for their sharp satire and dark humor‚ offering critiques of Edwardian society. His unique storytelling style and ability to blend wit with macabre themes have left a lasting impact on English literature. As a master of the short story‚ Saki’s contributions remain widely studied and admired‚ with his works like The Open Window being essential reads in academic and literary circles.

Analysis and Criticism

The Open Window is praised for its masterful use of suspense and irony. Critics highlight Saki’s ability to craft a chilling narrative through subtle details and symbolism.

10.1 Critical Reception of the Story

Critics acclaim The Open Window for its masterful storytelling‚ blending horror and dark humor. The twist ending and exploration of deception are praised‚ while its concise structure enhances the suspense. Themes of tragedy and irony resonate deeply‚ making it a standout in Saki’s works. The story’s ability to balance genres and provoke thought has solidified its place in literary circles‚ with PDF versions aiding academic analysis.

10.2 Modern Interpretations of the Open Window

Modern readers interpret The Open Window as a psychological exploration of deception and perception. The story’s twist ending and Vera’s manipulation resonate with contemporary themes of mental health and social dynamics. The open window symbolizes both tragedy and illusion‚ reflecting Vera’s cunning. PDF versions have made the story accessible for modern analysis‚ allowing readers to delve into its layered meanings and relevance in today’s literary discussions.

The Open Window remains a timeless tale of deception and suspense‚ with its PDF availability ensuring accessibility for modern readers‚ preserving its enduring literary impact and appeal.

11.1 Relevance of “The Open Window” Today

The Open Window remains a timeless tale‚ offering insights into human psychology and deception. Its themes of suspense and irony continue to captivate modern readers‚ while the PDF format ensures easy accessibility‚ making it a popular choice for educational and literary purposes‚ preserving its relevance in today’s digital age for both students and enthusiasts of classic literature.

11.2 Final Thoughts on the Story’s Impact

The Open Window leaves a lasting impression with its masterful blend of suspense and irony. The ease of access via PDF has ensured its popularity‚ making it a staple in classrooms and a favorite among literature lovers. Saki’s ability to craft a chilling narrative continues to captivate readers‚ solidifying its place as a timeless classic in modern literary discourse and educational curricula.

keyfit 35 manual

The KeyFit 35 is a top-rated infant car seat designed for safety and comfort, accommodating babies from 4 to 35 pounds in a rear-facing configuration․

1․1 Overview of the KeyFit 35 Car Seat

The KeyFit 35 is an advanced infant car seat designed for babies from 4 to 35 pounds, emphasizing safety, comfort, and convenience․ Its rear-facing configuration ensures optimal protection for newborns and growing infants․ The seat features extended legroom and a 5-position headrest system, accommodating your child’s growth․ The KeyFit 35 manual provides detailed instructions for installation, usage, and maintenance, ensuring parents can maximize the seat’s safety features․ With its ClearTex fabric and Easy-Extend Headrest, it offers a premium experience for both babies and parents․ The manual is essential for understanding how to properly secure your child and adjust the seat as they grow․

1․2 Importance of the KeyFit 35 Manual

The KeyFit 35 manual is a crucial resource for ensuring the car seat is used correctly, offering step-by-step installation and maintenance guidelines․ It provides essential safety information, such as weight and height limits, proper buckling techniques, and aircraft certification details․ The manual helps parents navigate the seat’s features, like the 5-position headrest and ClearTex fabric, ensuring optimal functionality․ It also outlines important safety warnings to prevent potential hazards, such as incorrect installation or misuse․ By following the manual, parents can maximize their child’s safety and extend the seat’s lifespan through proper care and maintenance․ Regularly reviewing the manual ensures compliance with safety standards and regulations․

Key Features of the KeyFit 35

The KeyFit 35 offers advanced features like ClearTex fabric for extended use, a 5-position headrest, and a lightweight design for easy transport, ensuring comfort and safety․

2․1 ClearTex Extended-Use Fabric

The ClearTex Extended-Use Fabric on the KeyFit 35 is a premium, breathable material designed for long-lasting comfort and durability․ Approved for use in extended rear-facing configurations, it ensures proper airflow, preventing overheating and keeping your baby comfortable during extended trips․ This innovative fabric is easy to clean and maintain, making it practical for daily use․ The ClearTex material is also free from harsh chemicals, ensuring a safe environment for your child․ Its soft texture provides a snug fit, while its moisture-wicking properties help regulate temperature, keeping your baby cool in summer and warm in winter․ This feature enhances the overall safety and comfort of the KeyFit 35, making it an excellent choice for parents seeking a reliable infant car seat․

2․2 5-Position Easy-Extend Headrest System

The KeyFit 35 features a 5-Position Easy-Extend Headrest System, designed to accommodate your baby’s growth seamlessly․ This system allows the headrest to adjust vertically, ensuring proper alignment with the harness as your child grows taller․ The easy-extend mechanism simplifies height adjustments, providing a customized fit without rethreading the harness․ This feature ensures optimal safety and comfort, supporting your baby’s head and neck as they grow․ The system also integrates with the seat’s overall design, maintaining a snug and secure position for your child․ With its intuitive adjustments, the 5-Position Easy-Extend Headrest System enhances the KeyFit 35’s versatility, making it a practical choice for parents seeking a long-lasting car seat solution․

Installation and Usage

The KeyFit 35 can be installed with or without the base using a seatbelt or LATCH system․ Proper buckling ensures safety, while the base provides stability․

3․1 Installing the KeyFit 35 Without the Base

Installing the KeyFit 35 without the base is straightforward but requires attention to detail․ First, locate the vehicle’s seatbelt and ensure it is fully extended․ Position the car seat in the rear-facing position, aligning it with the vehicle’s seat․ Route the seatbelt through the designated belt path on the car seat, ensuring it lies flat and is not twisted․ Tighten the seatbelt by pulling the shoulder portion until the car seat is securely in place․ Double-check the installation by tugging gently on the seat to ensure it does not move more than an inch in any direction․ Finally, verify the car seat’s level using the built-in bubble level indicator to ensure proper positioning․ Always refer to the manual for specific vehicle compatibility and additional tips․

3․2 Proper Buckling Techniques for Newborns

Proper buckling is essential for ensuring your newborn’s safety in the KeyFit 35․ Begin by placing your baby in the seat, ensuring their back is flat against the seatback․ The harness straps should be snug but not overly tight, with the chest clip positioned at armpit level․ The crotch strap should be adjusted to fit comfortably between the legs, preventing excessive movement․ Tighten the harness by pulling the shoulder straps until you can only fit one finger between the straps and your baby’s chest․ Regularly check the fit as your baby grows, ensuring the harness and crotch strap are correctly positioned․ Always consult the manual for specific guidance tailored to your vehicle and baby’s size․

Safety and Certification

The KeyFit 35 meets rigorous safety standards, including aircraft certification, ensuring reliable protection for your child in various environments․ Its design adheres to American safety regulations․

4;1 Weight and Height Limits

The KeyFit 35 is designed for infants weighing between 1․8 kg and 15․9 kg in rear-facing configuration․ It accommodates children up to 32 inches tall, ensuring extended use․ Weight and height limits are crucial for safe and proper fitting․ Exceeding these may compromise protection․ Always check your child’s growth against the specified ranges․ The seat’s design ensures a snug fit within these parameters, promoting optimal safety․ Adhering to these limits is essential for compliance with safety standards and certification․

4․2 Aircraft Certification

The KeyFit 35 is certified for use on aircraft, making it a versatile option for travel․ This certification ensures it meets stringent safety standards for both road and air travel․ Proper installation on an aircraft requires following specific guidelines, such as using the approved vehicle seatbelt and ensuring the seat is securely fastened․ The manual provides detailed instructions for aircraft installation, emphasizing the importance of correct positioning and securing the seat․ This feature adds convenience for families who travel frequently, knowing their child’s safety is maintained across different modes of transportation․ Always consult the manual and airline guidelines before using the KeyFit 35 on a plane․

Maintenance and Care

Regular cleaning and inspections are essential for the KeyFit 35․ Use mild soap and water for fabric and harness cleaning․ Avoid harsh chemicals or bleach․

5․1 Removing and Cleaning SoftGoods

The process of removing and cleaning the SoftGoods of the KeyFit 35 is straightforward․ First, unhook the elastic straps located below the carrying handle on both sides of the seat․ This allows easy access to the fabric cover․ Once removed, the SoftGoods can be hand-washed using mild soap and warm water․ Avoid using harsh chemicals or bleach, as they may damage the materials․ Gently scrub any stained areas and rinse thoroughly․ Allow the fabric to air-dry completely before reattaching it to the seat․ Regular cleaning ensures the seat remains hygienic for your baby․ Always refer to the manual for specific guidance․

5․2 Canopy Features and Adjustments

The KeyFit 35 canopy is designed to provide shade and comfort for your baby․ To remove the canopy, unhook the elastic straps on both sides below the carry handle․ Undo the toggle buttons located on the back of the seat to release the canopy completely․ For adjustments, the canopy can be positioned to block sunlight effectively․ Ensure it is securely attached when in use to maintain proper fit․ Regularly inspect the canopy for wear and tear․ Refer to the manual for detailed instructions on reattaching and adjusting the canopy․ Proper use ensures optimal protection and comfort for your child during travel․ Always follow the manufacturer’s guidelines for canopy maintenance․

Understanding the Manual

The KeyFit 35 manual provides comprehensive guidance on installation, usage, and maintenance․ It ensures safe and correct use of the car seat, covering all essential features and safety precautions․

6․1 Navigating the KeyFit 35 Manual

The KeyFit 35 manual is organized into clear sections, making it easy to find specific information․ It begins with an overview of the car seat’s features and safety guidelines․ Installation instructions are detailed, covering both base and base-free setups․ The manual also includes sections on proper buckling techniques, weight and height limits, and maintenance tips․ Important safety warnings are highlighted throughout, ensuring users are aware of critical precautions․ The manual concludes with troubleshooting and FAQs, addressing common concerns․ By following the manual’s structured format, users can ensure the car seat is used safely and effectively․ Regular updates and additional resources are available online for further assistance․

6․2 Important Safety Warnings

The KeyFit 35 manual emphasizes critical safety precautions to ensure proper use․ Never install the seat in a front-facing configuration for infants, and avoid seats with active frontal airbags․ The seat is certified for rear-facing use only for babies weighing 4-35 pounds and measuring up to 32 inches tall․ Always secure the harness snugly, and ensure the base is properly anchored․ Failure to follow guidelines can result in serious injury or death․ Additionally, the manual warns against modifying the seat or using it with unauthorized accessories․ Regularly inspect the seat for damage, and never use it if it has been in an accident․ Always refer to the manual and vehicle owner’s manual for complete safety guidelines․

sword of storms pdf

Hellboy wields the Sword of Storms, a powerful weapon forged in Japanese mythology, central to his battles against demons and supernatural forces in the animated film․

1․1 Overview of the “Sword of Storms” Storyline

The Sword of Storms is central to Hellboy’s animated adventure, where he battles demons and encounters Japanese folklore creatures․ The story follows Hellboy as he discovers the sword, a powerful weapon forged in mythology, and uses it to combat supernatural forces․ The narrative blends action, horror, and humor, showcasing Hellboy’s journey to understand the sword’s significance and its role in his destiny․

1․2 Significance of the Sword in the Hellboy Universe

The Sword of Storms holds immense significance as a legendary weapon in the Hellboy universe, symbolizing power and destiny․ It is central to Hellboy’s battles against demons and serves as a key artifact tied to ancient prophecies․ The sword’s ability to taste demon blood underscores its uniqueness and importance in combating supernatural threats, making it an iconic element of Hellboy’s identity and mission․

Background of the Sword of Storms

The Sword of Storms originates from ancient Japanese folklore, forged to combat demons․ Its historical lore ties it to Hellboy’s destiny, making it a crucial artifact in his epic battles․

2․1 Historical Lore and Mythology Surrounding the Sword

The Sword of Storms is deeply rooted in Japanese mythology, forged to vanquish demons․ Its lore ties it to ancient legends, where it was wielded by heroes to restore balance․ Hellboy discovers it in a realm filled with folklore creatures, highlighting its connection to mythological battles․ The sword’s origin and purpose are central to its significance in the Hellboy universe, making it a legendary artifact․

2․2 The Sword’s Role in Hellboy’s Animated Adventures

In the animated film Hellboy: Sword of Storms, the sword plays a pivotal role in Hellboy’s quest․ It serves as his primary weapon against demons and supernatural beings, enabling him to combat formidable foes․ The sword’s power is central to the story, as it aids Hellboy in navigating the challenges of the animated adventures, making it an indispensable tool in his battles against evil forces․

Plot Analysis of “Sword of Storms”

The story follows Hellboy as he discovers the Sword of Storms, a powerful weapon against demons, and battles supernatural forces, encountering folklore creatures along the way․

3․1 Key Events and Turning Points in the Story

Hellboy discovers the Sword of Storms, forged in Japanese mythology, and battles demons and zombies․ He encounters folklore creatures, including those from Japanese myths, which shape his journey․ The sword’s power is revealed as it aids Hellboy in defeating supernatural foes, marking a turning point in his quest to fulfill his destiny and protect humanity from dark forces․

3․2 Themes of Demons, Folklore, and Heroism

The Sword of Storms explores themes of demons, folklore, and heroism, blending dark fantasy with Japanese mythology․ Hellboy battles demonic forces and encounters creatures like zombies and folklore beings, showcasing his role as a reluctant hero․ The story highlights the struggle between good and evil, emphasizing Hellboy’s courage and the sword’s symbolic power in his quest to protect humanity from supernatural threats․

The Sword’s Powers and Abilities

The Sword of Storms possesses extraordinary powers, including tasting demon blood, making it a potent weapon against supernatural forces, central to Hellboy’s battles against evil․

4․1 How the Sword Tastes Demon Blood

The Sword of Storms uniquely identifies and tastes demon blood, allowing it to detect and combat supernatural threats effectively․ This ability enhances Hellboy’s combat strategy, making the sword indispensable in battles․

4․2 The Sword as a Weapon Against Supernatural Forces

The Sword of Storms is a formidable weapon against supernatural enemies, capable of slaying demons and otherworldly beings․ Its origins in Japanese mythology grant it enhanced power, making it a crucial tool for Hellboy in his battles against dark forces and folklore creatures;

Hellboy’s Journey with the Sword

Hellboy discovers the Sword of Storms during his adventures, wielding it against demons and supernatural threats․ Its power and lore shape his destiny, making it a key element in his battles and personal growth․

5․1 Hellboy’s First Encounter with the Sword

Hellboy’s first encounter with the Sword of Storms occurs during a mission where he faces a demon summoned in World War II․ The sword’s power is revealed as it tastes demon blood, instantly bonding with Hellboy․ This moment marks the beginning of his reliance on the sword as a legendary weapon against evil forces, shaping his future battles and identity․

5․2 The Sword’s Impact on Hellboy’s Character Development

The Sword of Storms profoundly shapes Hellboy’s character, transforming him from a reluctant hero to a confident warrior․ Wielding the sword, he embraces his destiny, uncovering his true identity and purpose․ The sword becomes a symbol of his inner strength and resolve, driving him to confront his demons and protect humanity, solidifying his role as a champion against darkness and chaos․

Cultural and Folklore Significance

The Sword of Storms draws heavily from Japanese folklore, featuring creatures like yokai and oni, and symbolizes the clash between ancient traditions and modern heroism, enriching its narrative depth․

6․1 Japanese Folklore Creatures in the Story

The Sword of Storms introduces various Japanese folklore creatures, such as yokai and oni, which Hellboy encounters during his adventures․ These supernatural beings, deeply rooted in Japanese mythology, play a pivotal role in the narrative, challenging Hellboy and emphasizing the sword’s significance as a weapon against such entities․ Their inclusion enriches the story, blending traditional folklore with modern heroism․

6․2 The Sword’s Connection to Japanese Mythology

The Sword of Storms is deeply rooted in Japanese mythology, forged from ancient legends and mystical energies․ Its design and lore draw inspiration from traditional Japanese weaponry and folklore, symbolizing power and destiny․ The sword’s connection to Japanese mythology highlights its cultural significance, making it a vital tool for Hellboy in battling supernatural forces and fulfilling its prophesied purpose in the story․

The Sword’s Design and Symbolism

The Sword of Storms features a sleek, ancient design, symbolizing power and destiny․ Its dark, mystical aesthetic reflects its role as a weapon against evil, embodying Hellboy’s struggle․

7․1 Visual Representation of the Sword in the Comic and Film

In the comic, the Sword of Storms is depicted with bold lines and vibrant colors, emphasizing its otherworldly nature․ In the animated film, its design is more detailed, featuring intricate patterns and a glowing edge, highlighting its mystical origins․ The visual contrast between the comic and film underscores its significance as a powerful artifact in Hellboy’s arsenal, blending aesthetics with lore seamlessly․

7․2 Symbolic Meaning of the Sword in Hellboy’s Quest

The Sword of Storms symbolizes Hellboy’s dual identity and destiny․ It represents his connection to both humanity and the supernatural, serving as a bridge between worlds․ The sword embodies his struggle for redemption and acceptance, while its power signifies the burden of his prophesied role as a savior or destroyer․ Its presence in his quest underscores themes of heroism and sacrifice, central to his journey․

The Sword’s Role in the Animated Film

The Sword of Storms debuts in the animated film Hellboy: Sword of Storms, where it becomes central to Hellboy’s battle against demons and supernatural forces, highlighting its significance․

8․1 The Sword’s Debut in Hellboy: Sword of Storms

The Sword of Storms first appears in the animated film Hellboy: Sword of Storms, where it is discovered by Hellboy in a realm filled with Japanese folklore creatures․ This ancient weapon, forged in mythology, becomes crucial in his fight against demons and supernatural forces, showcasing its power and significance in the story․

8․2 The Sword’s Importance in the Animated Series

The Sword of Storms plays a central role in the animated series, serving as both a tactical weapon and a symbol of Hellboy’s destiny․ Its connection to Japanese folklore enhances the narrative, while its ability to vanquish demons solidifies its importance in Hellboy’s battles․ The sword’s presence elevates the stakes, making it an indispensable element in the story’s progression and the hero’s journey․

The Sword’s Legacy in Pop Culture

The Sword of Storms has left a lasting impact on comic and film art, inspiring fans with its iconic design and supernatural lore, becoming a cultural phenomenon․

9․1 The Sword’s Influence on Comic Book and Film Art

The Sword of Storms has become a cultural icon, inspiring comic book artists and filmmakers with its striking design and supernatural lore․ Its influence is evident in the dark, gothic aesthetics of modern graphic novels and animated features, particularly in works by Guillermo del Toro, who brought the sword to life in Hellboy: Sword of Storms․ Fans and creators alike admire its visual and symbolic depth․

9․2 Fan Reactions and Memorable Moments with the Sword

Fans of Hellboy: Sword of Storms have praised the sword’s iconic design and its pivotal role in the story․ Memorable moments include Hellboy wielding it against powerful demons and its debut in the animated film․ The sword’s cultural significance and visual appeal have made it a fan favorite, symbolizing Hellboy’s destiny and strength․ Its impact on the franchise is undeniable, leaving a lasting impression on audiences worldwide․

The Sword’s Practical Uses

The Sword of Storms is a tactical weapon used by Hellboy to combat demons and supernatural beings, utilizing its unique ability to taste demon blood effectively․

10․1 The Sword as a Tactical Weapon

The Sword of Storms serves as a versatile tactical weapon for Hellboy, enhancing his combat effectiveness against various supernatural enemies․ Its ability to taste demon blood provides Hellboy with crucial insights, allowing him to anticipate and counter his foes’ strategies․ Additionally, the sword’s design emphasizes both offense and defense, making it an indispensable tool in Hellboy’s arsenal․

10․2 The Sword’s Role in Hellboy’s Arsenal

The Sword of Storms is a cornerstone in Hellboy’s arsenal, complementing his physical strength and combat skills․ It stands out as a unique weapon, capable of defeating demons and otherworldly beings․ The sword’s significance lies in its adaptability and historical power, making it an irreplaceable asset for Hellboy in his battles against evil forces and supernatural threats․

The Sword’s Connection to Hellboy’s Destiny

The Sword of Storms is central to Hellboy’s destiny, symbolizing his role as a warrior against evil and fulfilling an ancient prophecy tied to his purpose․

11․1 The Sword’s Prophecy and Hellboy’s Purpose

The Sword of Storms is tied to an ancient prophecy, marking Hellboy as the chosen warrior destined to wield it against evil forces․ Its power signifies his purpose as a bridge between worlds, balancing humanity and the supernatural․ The sword’s legacy is intertwined with Hellboy’s fate, making him the key to unlocking its true potential in the battle against darkness and chaos․

11․2 The Sword’s Role in Hellboy’s Final Battles

The Sword of Storms plays a pivotal role in Hellboy’s climactic confrontations, serving as a decisive weapon against formidable foes․ Its power to vanquish supernatural enemies makes it indispensable in the final showdowns, aligning with Hellboy’s destiny as the chosen hero․ The sword’s presence underscores the gravity of these battles, symbolizing the ultimate clash between good and evil, and Hellboy’s unwavering resolve to protect humanity from annihilation․

The Sword of Storms embodies Hellboy’s epic battles and destiny․ Readers can explore its legacy in the Sword of Storms PDF, available online for enthusiasts of Guillermo Del Toro’s animated feature․

12․1 Final Thoughts on the Sword’s Significance

The Sword of Storms holds profound significance as both a weapon and a symbol in Hellboy’s quest․ Forged in Japanese mythology, it embodies the clash between humanity and the supernatural․ Its ability to vanquish demons underscores its role as a pivotal tool in Hellboy’s battles․ Beyond its practical use, the sword represents Hellboy’s destiny and the enduring struggle against darkness, making it an iconic element in the Hellboy universe․

12․2 How to Access and Read the “Sword of Storms PDF”

To access the Sword of Storms PDF, visit official digital platforms or comic book archives․ Ensure you use legal sources to download or read the content․ The PDF offers a detailed dive into Hellboy’s adventures, the sword’s lore, and its significance in Japanese mythology․ Fans of the franchise will find it a valuable resource for understanding the story’s depth and artistry․

lego fish tank instructions

Explore the charm of LEGO fish tanks, blending LEGO creativity with aquarium functionality․ This innovative project merges bricks and water, offering a unique mix of art and engineering․ Ideal for enthusiasts seeking a creative DIY challenge that combines passion for LEGO and aquatic life․ Join a vibrant community sharing inspiring builds and ideas․

1․1 What is a LEGO Fish Tank?

A LEGO fish tank is a creative fusion of LEGO bricks and aquarium functionality, offering a unique blend of art, engineering, and aquatic life․ It involves constructing a functional aquarium using LEGO pieces, often combined with additional materials for water circulation and filtration․ Enthusiasts have taken this concept further by incorporating motorized components, such as remote-controlled cameras or moving parts, showcasing the versatility of LEGO․ For instance, a LEGO tank named Metal Grudge was even used on a skateboard ramp with a remote-controlled LEGO camera rig․ This innovative project allows builders to express their creativity while providing a home for fish, making it a fascinating DIY challenge for LEGO and aquarium enthusiasts alike․

1․2 Why Build a LEGO Fish Tank?

Building a LEGO fish tank offers a unique opportunity to combine creativity with functionality, appealing to both LEGO enthusiasts and aquarium hobbyists․ It allows for endless customization, enabling builders to design tanks that reflect their personal style or favorite themes․ The process fosters problem-solving skills and creativity, making it an engaging DIY project․ Additionally, it provides a platform for innovation, as seen in examples like the motorized Metal Grudge tank, which incorporates advanced LEGO mechanisms․ This project not only results in a visually striking aquarium but also serves as a conversation piece, showcasing one’s ingenuity and passion for both LEGO and aquatic life․

Materials and Tools Needed

Gather LEGO bricks, plates, and specialized pieces like motors and pumps․ Additional tools include drills, water-resistant adhesives, and electrical components for functionality․ Ensure all materials are compatible with water․

2․1 LEGO Pieces and Sets Required

To build a LEGO fish tank, you’ll need specific LEGO pieces such as plates, bricks, and specialized elements like motors, pumps, and transparent panels․ LEGO Mindstorms or Power Functions sets are ideal for adding movement and automation․

Include LEGO Technic pieces for structural stability and minifigure-scale accessories for themed details․ Transparent LEGO bricks or windows are essential for visibility․ Ensure you have a variety of colors and shapes to customize your design․ Additional LEGO sets like Creator Expert or City themes can provide decorative elements․ Don’t forget LEGO gaskets or seals to ensure water tightness․ A LEGO remote control or programmable components can enhance functionality․ Always verify compatibility of LEGO pieces with water and electrical components before assembly․

2․2 Additional Materials for Aquarium Functionality

Beyond LEGO bricks, you’ll need a water pump and filtration system to maintain clean water․ A heater may be necessary, depending on the fish species․ Add waterproof adhesives to seal gaps between LEGO pieces․ Include gravel, plants, and decorations for a natural environment․ Install LED lighting for visibility and aesthetics․ A water test kit is essential for monitoring quality․ Consider electrical components like motors for automated features․ Use wireless controllers or sensors for remote monitoring․ Ensure all materials are aquarium-safe to protect fish health․ These additions will transform your LEGO creation into a fully functional aquarium․

Step-by-Step Assembly Guide

Begin with the base structure, ensuring stability and alignment․ Progress to installing the water pump and filtration system․ Follow detailed instructions for each component to achieve functionality and aesthetics․

3․1 Base Structure Construction

Start by building a sturdy base using flat LEGO plates and bricks, ensuring stability․ The base should be large enough to accommodate the tank and support its weight․ Use a spirit level to ensure the structure is perfectly horizontal․ Begin with a solid layer of bricks, then add walls to create the tank’s frame․ Leave space for the water pump and filtration system․ Reinforce corners with angle pieces for added strength․ Once the base is complete, attach it securely to a flat surface to prevent tipping․ Finally, test the structure by placing a small container of water inside to ensure it is watertight before adding fish or decorations․

3․2 Water Pump and Filtration System Installation

Install the water pump and filtration system to maintain clean water and a healthy environment for fish․ Begin by attaching the pump to the base structure using LEGO Technic pieces․ Ensure the pump is submersible and securely fastened to prevent movement․ Next, connect the filtration system, which can be built using LEGO elements like tubes and small motorized parts․ Position the filter near the pump for efficient water circulation․ Use LEGO Power Functions or Mindstorms components to automate the system․ Test the pump and filter by filling the tank with water and observing the flow․ Adjust as needed to ensure proper water circulation and filtration․ This step is critical for sustaining aquatic life in your LEGO fish tank․

3․3 Decoration and Theming Ideas

Elevate your LEGO fish tank with creative decoration and theming․ Use LEGO bricks to build coral reefs, sunken ships, or treasure chests for a unique underwater scene․ Add plants, either real or LEGO-made, to create natural habitats․ Incorporate themed mini-figures, such as divers or sea creatures, to add personality․ For a dynamic look, use motorized LEGO parts to create moving elements like waves or swimming fish․ Consider lighting effects, such as LED lights, to highlight your design․ Themes like pirate-themed, futuristic, or tropical ecosystems can make your tank stand out․ Experiment with colors and patterns to match your chosen theme․ Don’t forget to add a LEGO remote-controlled camera for a fun, interactive touch to showcase your creation․

Maintenance and Upkeep

Regular maintenance ensures your LEGO fish tank remains functional and visually appealing․ Clean the tank, monitor water quality, and inspect LEGO components regularly for optimal performance․

4․1 Cleaning the Tank

Cleaning your LEGO fish tank requires careful attention to maintain its functionality and appearance․ Start by gently removing decorations and LEGO elements, ensuring no pieces are damaged․ Use a soft-bristled brush to scrub away algae and debris from both the glass and LEGO components․ Avoid harsh chemicals, as they can harm the fish or damage the LEGO bricks․ Instead, rinse all parts with clean water and mild soap․ Regular cleaning prevents grime buildup and keeps the tank clear․ After cleaning, reassemble the tank slowly, ensuring all LEGO pieces fit securely․ This routine maintenance will help preserve your LEGO fish tank’s integrity and keep it looking its best․

4․2 Monitoring Water Quality

Regular water quality monitoring is essential for maintaining a healthy environment in your LEGO fish tank․ Use a water test kit to check parameters like ammonia, nitrite, and nitrate levels․ These kits are readily available at pet stores and provide accurate readings․ Perform partial water changes weekly to keep the tank balanced․ Additionally, observe your fish for signs of stress, such as labored breathing or discoloration, which can indicate poor water quality․ Keep a log of your test results to track changes over time․ Consistent monitoring ensures your fish remain healthy and your LEGO aquarium continues to function smoothly․ Regular testing is a simple yet critical step in aquarium care․

4․3 Troubleshooting Common Issues

Troubleshooting is key to maintaining your LEGO fish tank’s functionality․ Common issues include mechanical malfunctions, water leaks, or poor water circulation․ Check motorized components like pumps and filters for blockages or loose connections․ Inspect LEGO seals and joints for gaps that may cause leaks․ If water quality drops, ensure proper filtration and regular water changes․ Remote-controlled features may require recalibration or battery replacements․ Addressing these issues promptly prevents larger problems․ Regular maintenance and inspections can help identify and resolve issues early․ By staying proactive, you can ensure your LEGO aquarium remains a thriving and unique creation․ Always refer to your LEGO instructions or online forums for tailored solutions․

Advanced Customization

Elevate your LEGO fish tank with motorized components, remote control features, and vibrant lighting effects․ Add intricate details or themed elements to enhance functionality and visual appeal․

5․1 Adding Motorized Components

Add dynamic functionality to your LEGO fish tank with motorized elements․ Use LEGO Power Functions or Mindstorms components to create moving parts, such as automated water pumps or rotating decorations․ Install motorized LEGO vehicles or remote-controlled features for interactive play․ A programmable motor system can enhance the tank’s functionality, allowing for timed water circulation or themed animations․ Pair motors with custom LEGO gears or axles to create complex mechanisms․ For advanced setups, integrate sensors to monitor and adjust water conditions automatically․ Consider adding a LEGO train or submarine that interacts with the tank’s environment․ These motorized additions bring life and interactivity to your LEGO aquarium, showcasing both creativity and engineering prowess․

5․2 Incorporating Lighting Effects

Elevate your LEGO fish tank with stunning lighting effects that enhance its visual appeal․ Use LEGO LED lights or glow-in-the-dark bricks to create mesmerizing underwater scenes․ Install color-changing lights to simulate day-night cycles, adding a realistic touch․ Fiber-optic cables can mimic sparkling water or create a starry background․ Program lighting effects using LEGO Mindstorms or external controllers for dynamic displays․ Add subtle illumination to highlight fish movements or decorate the tank’s exterior with glowing LEGO accents․ Lighting effects not only beautify the tank but also provide a unique way to showcase your LEGO creativity․ Experiment with layered lighting to create depth and ambiance, making your LEGO aquarium a captivating centerpiece for any room․

5․3 Remote Control Features

Enhance your LEGO fish tank with remote control features for added interactivity and convenience․ Utilize LEGO Mindstorms or third-party controllers to operate motorized components, such as water pumps or decorative elements․ Program the system to automate tasks like feeding fish or adjusting lighting effects․ A remote-controlled LEGO camera rig, as seen in creative builds, allows you to capture underwater footage․ Additionally, integrate sensors to monitor water levels or temperature, ensuring optimal conditions for aquatic life․ Remote control features not only make maintenance easier but also add a futuristic touch to your LEGO aquarium․ This innovative approach combines LEGO creativity with modern technology, offering endless possibilities for customization and control․

Discover the joy of LEGO fish tank creation by showcasing your build and connecting with a vibrant community․ Find inspiration, share ideas, and explore further with additional resources and guides available online, perfect for LEGO enthusiasts and aquarium lovers alike․

6․1 Showcasing Your Creation

Once your LEGO fish tank is complete, it’s time to share your masterpiece with the world․ Many creators showcase their builds on social media platforms, LEGO forums, and community events․ Highlight your design’s unique features, such as motorized components or custom theming, to inspire others․ For instance, the remote-controlled LEGO camera rig used to film a LEGO tank in action demonstrates how creativity can extend beyond the tank itself․ Additionally, incorporating whimsical elements, like a LEGO DJ Octopus, adds personality to your display․ Sharing your project not only gains recognition but also connects you with a passionate community eager to admire and learn from your work․

6․2 Further Reading and Community Support

For those eager to dive deeper into LEGO fish tank projects, there are numerous resources available online․ Blogs like NXT STEP Mindstorms and forums such as Eurobricks or The Brothers Brick offer detailed guides, tutorials, and inspiration․ Many LEGO enthusiasts share their experiences, from motorized LEGO tanks to intricate aquarium designs, providing valuable insights and tips; Additionally, communities on social media platforms and LEGO-specific groups are great for connecting with fellow builders, sharing ideas, and troubleshooting challenges․ Explore events like LEGO fan conventions or local meetups to showcase your creation and learn from experts․ These resources and communities are essential for staying inspired and refining your LEGO fish tank project․